OpenTheremin V4 Eurorack System

The OpenTheremin is a standalone theremin instrument with built-in oscillators, available as fully assembled, ready-to-play devices. It features control voltage (CV) outputs, allowing seamless integration with existing modular synthesizer systems. This makes it an ideal choice for musicians looking to expand their sound palette and incorporate the unique, touchless playing technique of the theremin into their modular setups.

The following instructions guide you through the process of integrating the OpenTheremin Eurorack modules into your system. These instructions assume that you are familiar with the basics of modular sound systems. If you are looking for a ready-to-play standalone OpenTheremin, we recommend the OpenTheremin V4.5 Electronics and Antenna Kit Bundle or the OpenTheremin V4.5 Deluxe Bundle instead.

OpenTheremin Eurorack Kit

The new Eurorack kit allows the integration of the OpenTheremin into modular Eurorack systems, enabling the creation of a versatile theremin instrument featuring various oscillators, filters, and more.

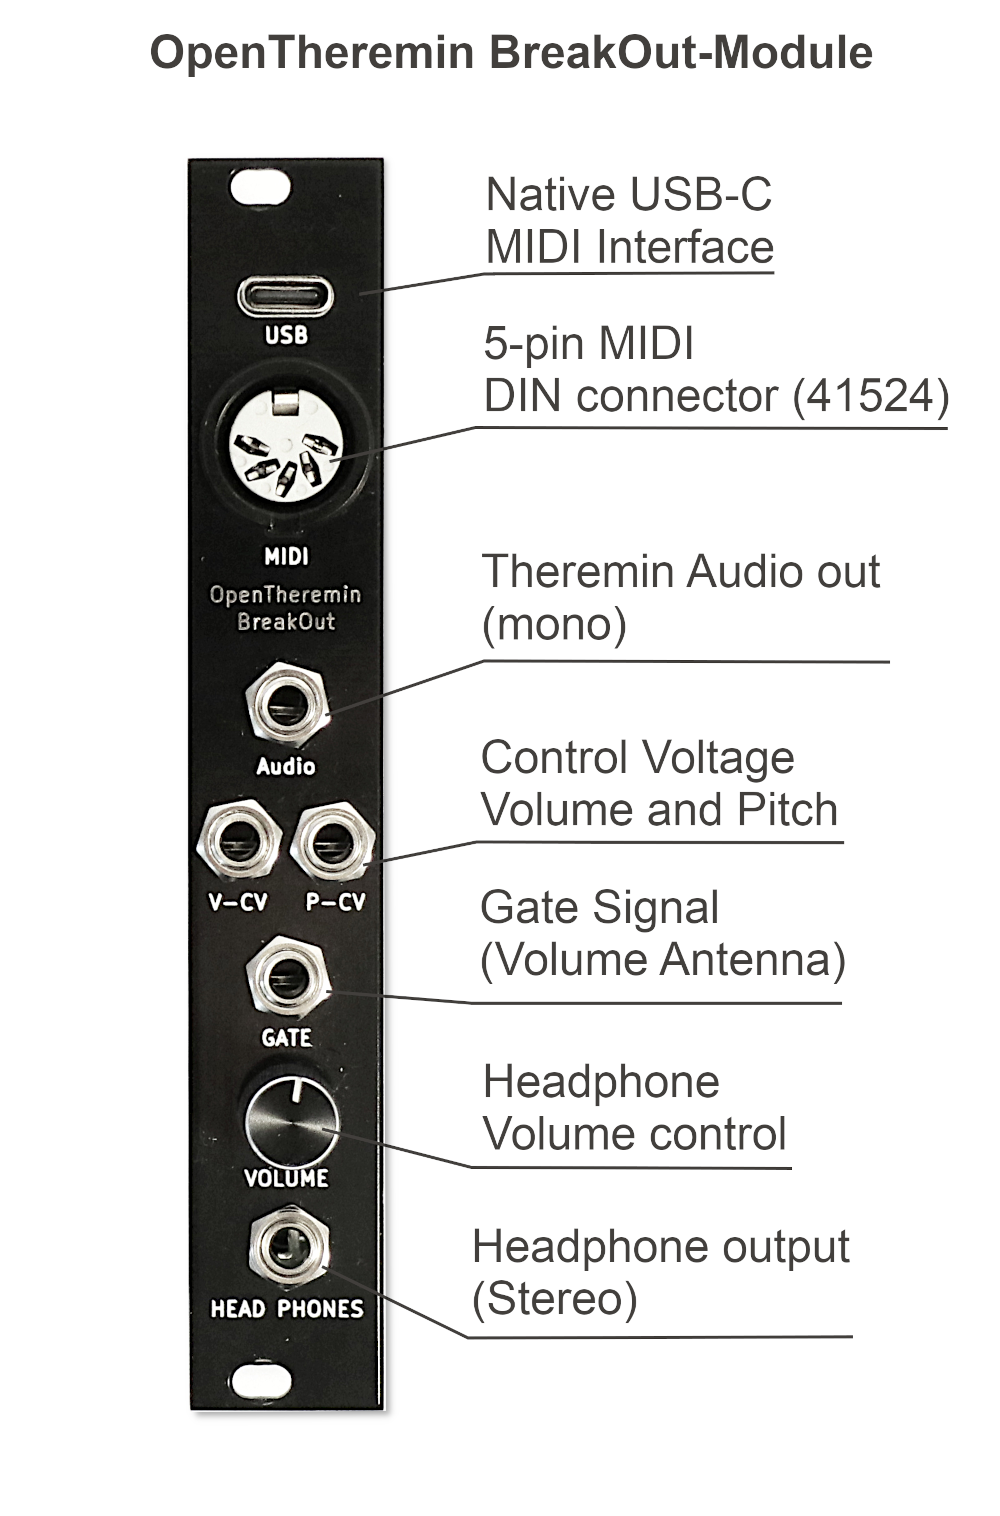
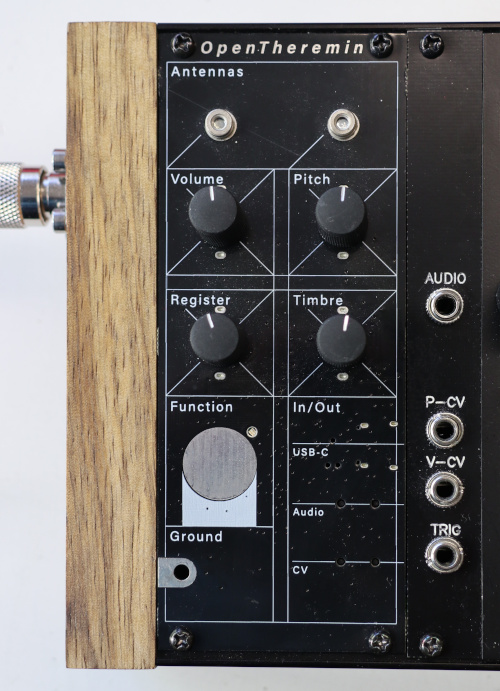
The included breakout module presents all necessary signals, such as control voltage (CV) for both antennas, a gate signal, and the theremin's original mono audio output on the front panel. Additionally, the breakout module includes a full-size DIN MIDI connector, a native USB-C MIDI connector, and a phono output with a separate volume control. This setup allows for extensive connectivity and flexibility in both performance and sound design.

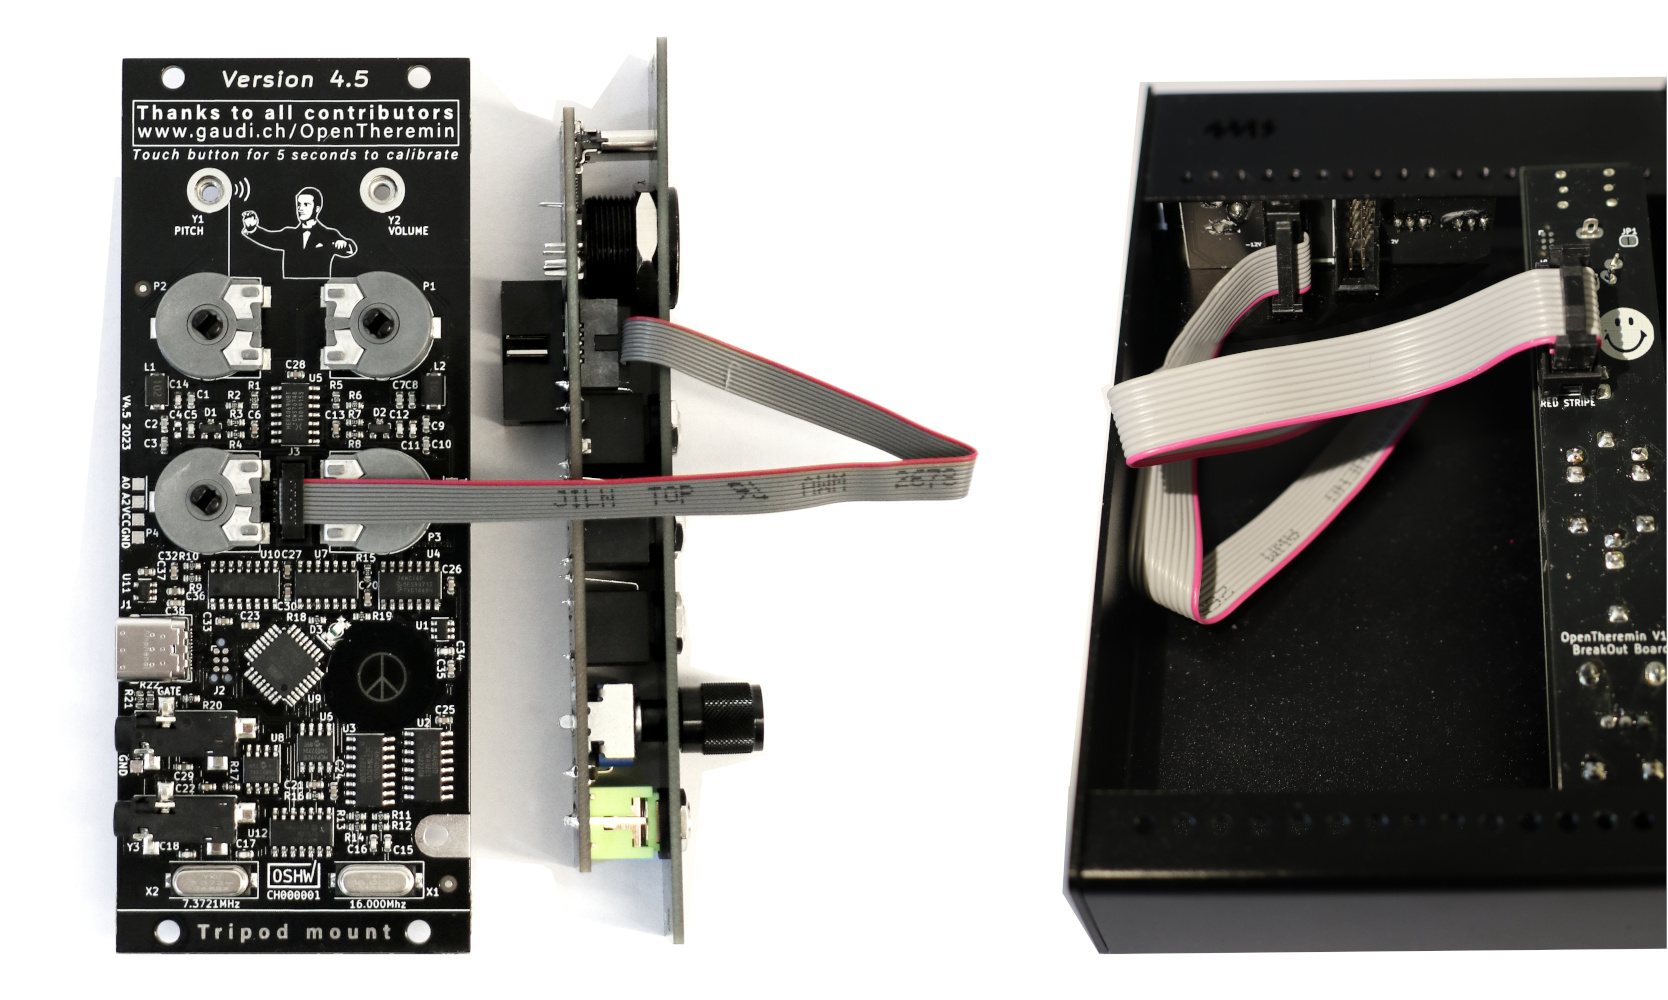
The breakout module connects to the OpenTheremin V4.5 module through an included micro-ribbon cable. The breakout module connects to the rack power supply rail through a standard Eurorack ribbon connector and cable.

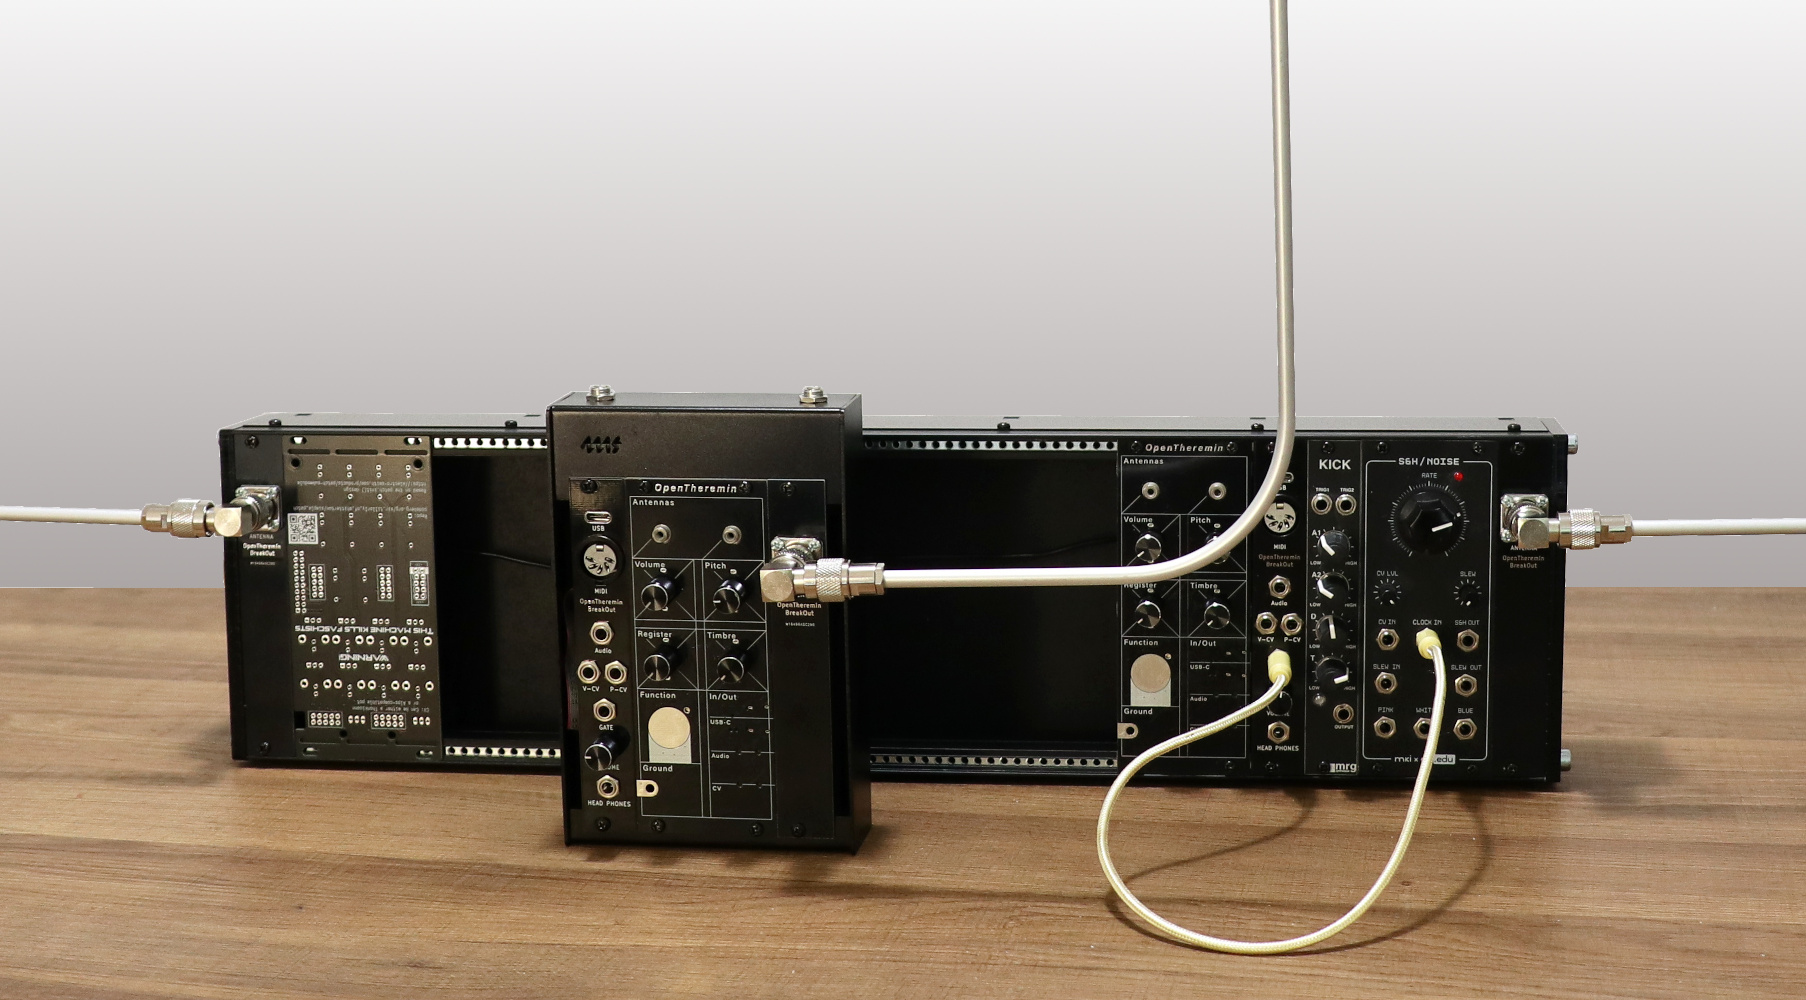
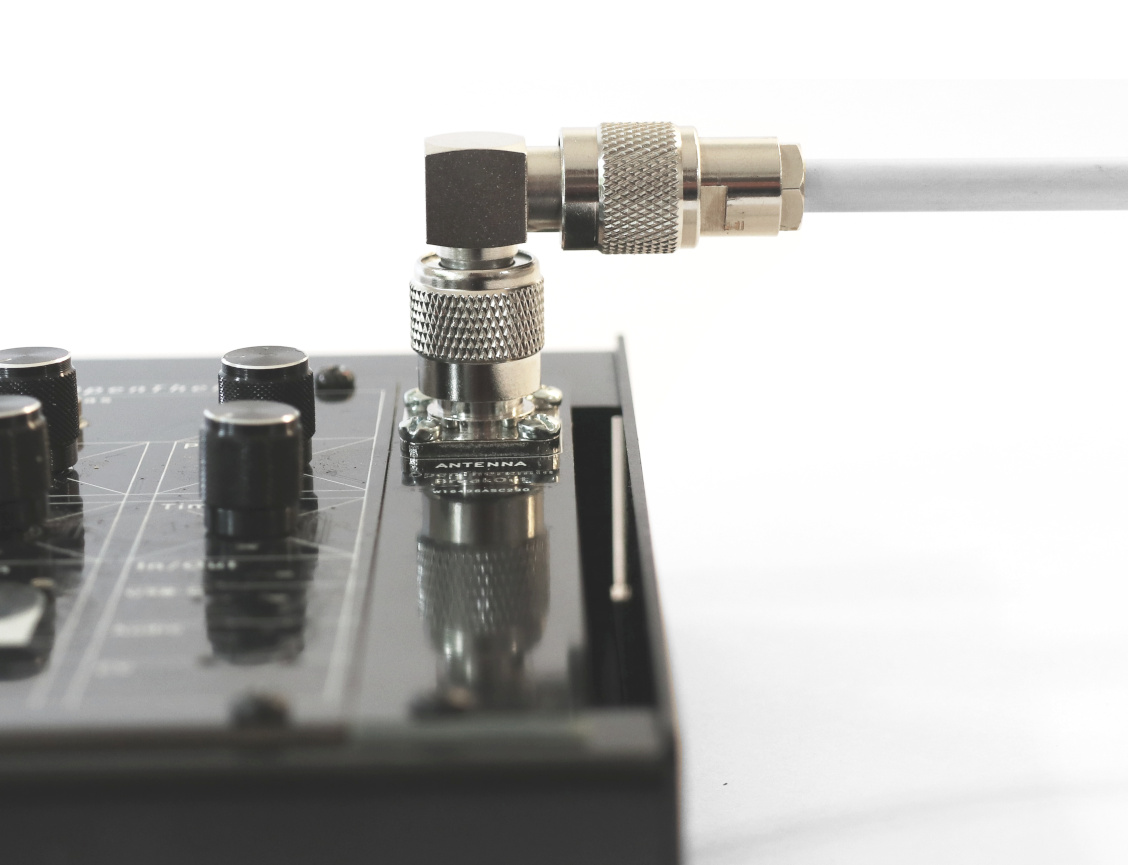
The modular kit comes with a volume and a pitch antenna equipped with solid TNC connectors. A modular system of TNC adapters and two extra antenna front panels provides flexible mounting options to integrate the antennas into the modular system.


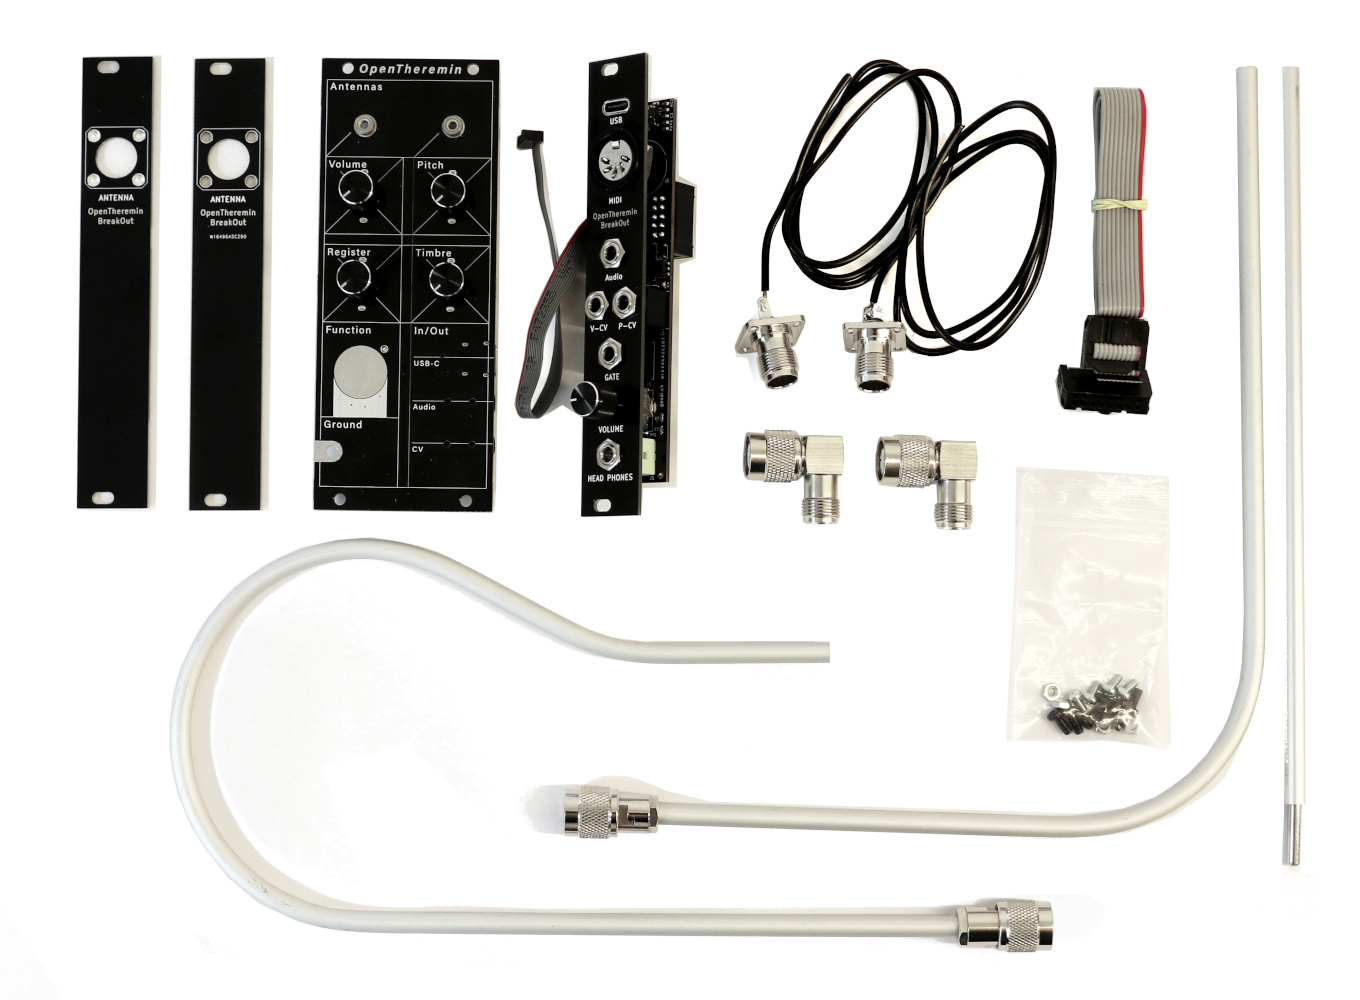
Parts included in the OpenTheremin Eurorack Kit

  • OpenTheremin V4.5 module with micro-ribbon connector and cable, preprogrammed with MIDI software and GATE signal enabled
  • OpenTheremin Break-Out Module, fully assembled with 3.5mm connectors, full-size MIDI DIN and native USB-C connector, headphone output
  • Volume and Pitch Antennas made from 6mm anodized aluminum with TNC connectors
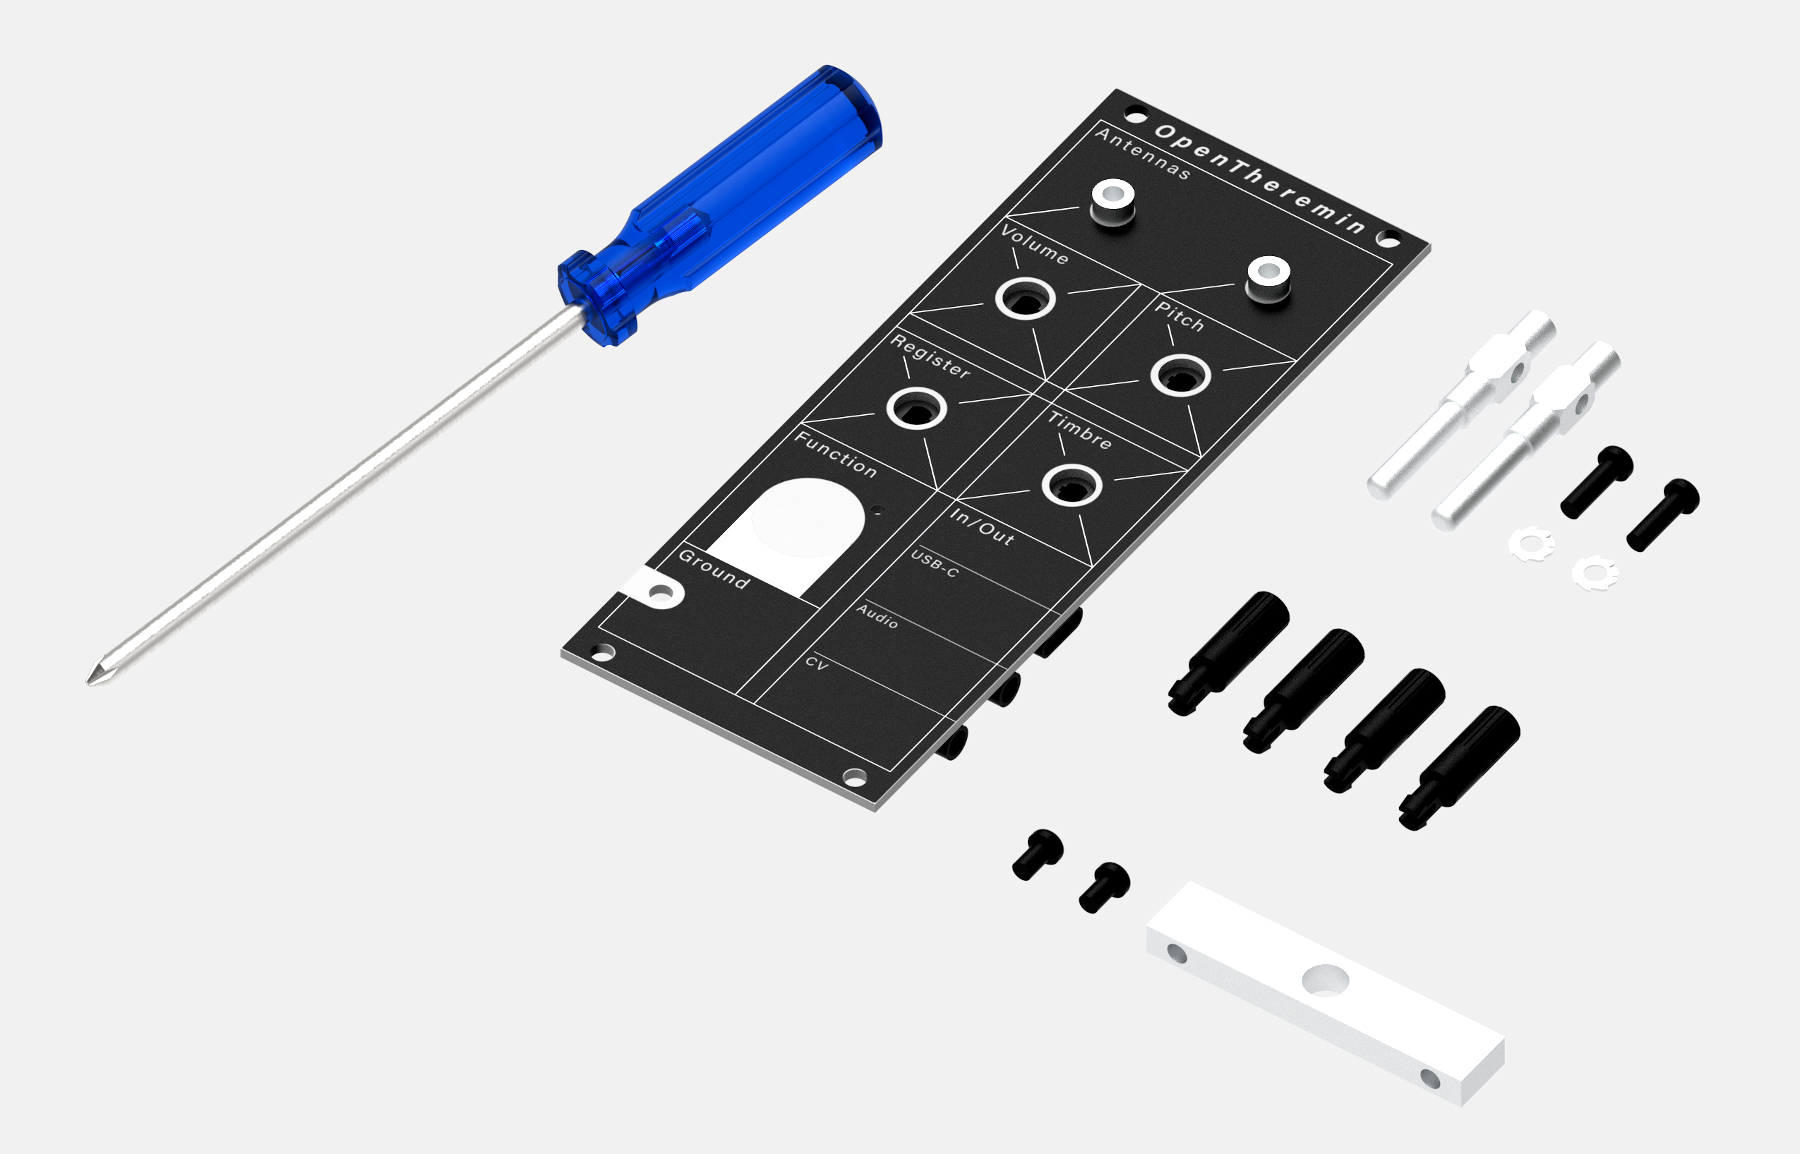
  • Antenna Eurorack mounting panels (2x)
  • TNC Antenna connectors with connecting wire (2x)
  • TNC Antenna angle connectors (2x)
  • Eurorack ribbon cable (10-16 pin)
  • Mounting screws

The design files and software for all modules are open source and available on GitHub.

OpenTheremin V4 Eurorack kits are available at gaudishop.ch

Build Instructions for the Modular Open Theremin

1. The modular case

The first thing to do is decide on a case to use. You can either build your own case or buy one from a wide selection available. The OpenTheremin works well with an all-wooden case but can also be built into a metal case with just wooden side plates or even in a full metal case. In case of a metal case you will need to be careful with fixing the antenna wires and connectors to prevent them from touching the metal case.

When choosing the case, you also want to consider the size of the case you select. The OpenTheremin can be mounted in cases as narrow as 14 HP and up to 100 HP (508 mm) or more. It all depends on what modules you want to include and how wide your modular theremin should be.

The OpenTheremin is 10 HP wide, the Break-Out module is 4 HP and the antenna mounting panels are 4 HP each.

2. Break-Out Board connections

The break-out module allows for easy integration of the OpenTheremin in an Eurorack system. Just connect the micro-ribbon cable of the break-out module to the micro connector on the OpenTheremin and all signals will be wired to the break.out module.

Using the included Eurorack ribbon cable the Theremin modules can be powered through the rack power system. Align the red stripe on the ribbon cable with the "red stripe" marking on both the break-out module and the power bus board of your system, and then securely connect the cable. Alternatively the Modular OpenTheremin can also be powered through the USB-C connection on the breakout module. However this will not provide power to the rest of the system.

3. Antenna connections

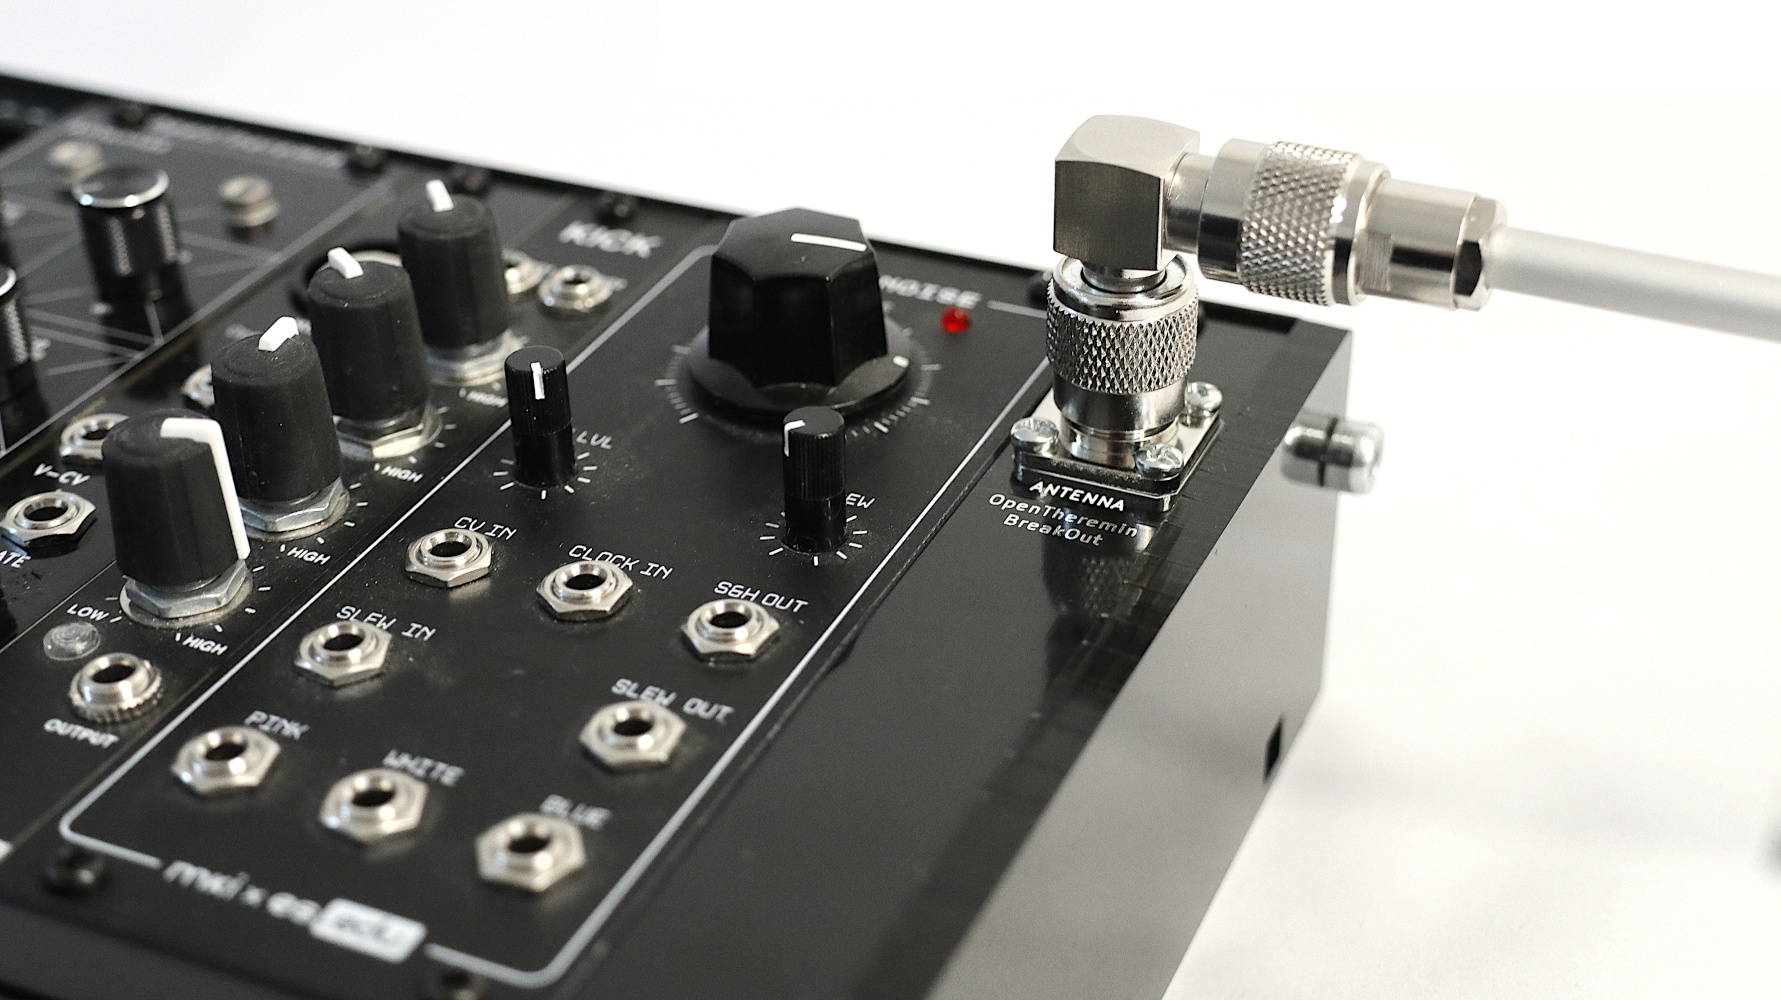
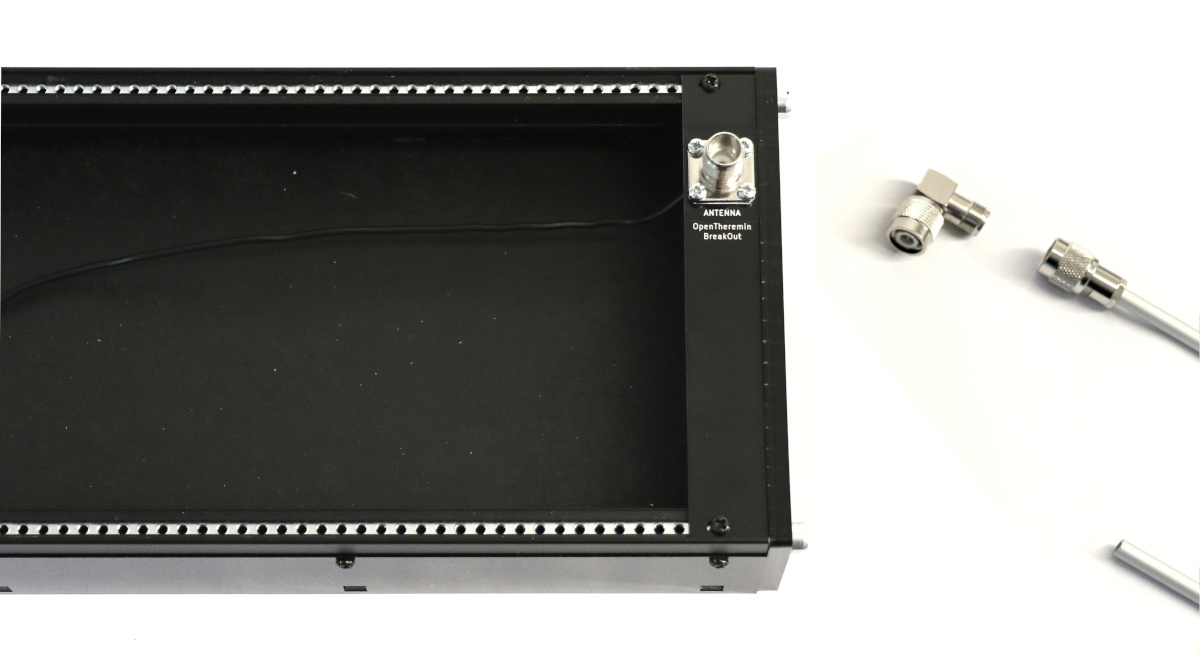
The antennas can be connected to the case through the antenna mounting panels.
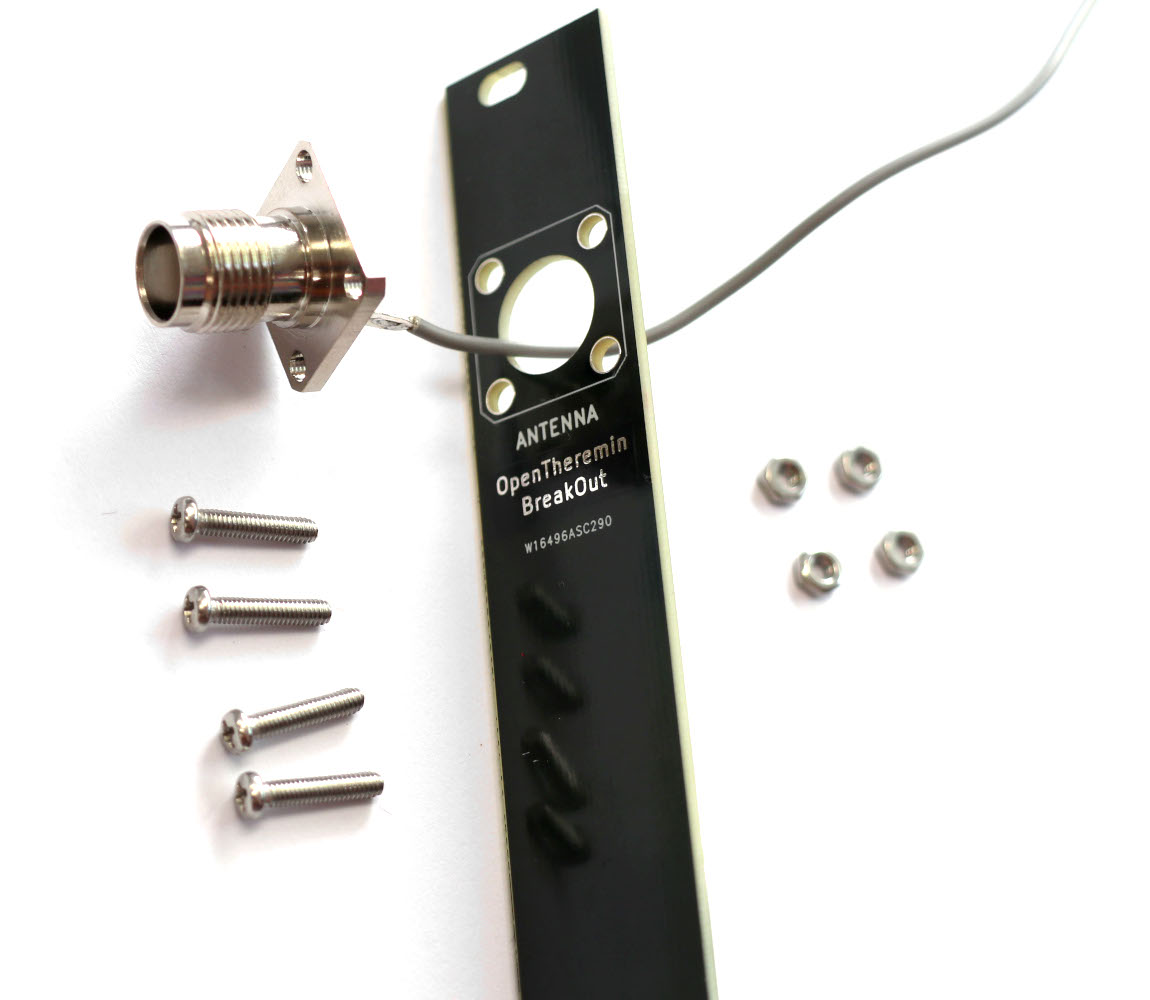

To mount an antenna with a mounting panel, route the wire of the TNC antenna connector through the hole in the mounting panel and then attach the connector with four M2.5 diameter screws and nuts.

Mount the antenna panels into the Eurorack case.


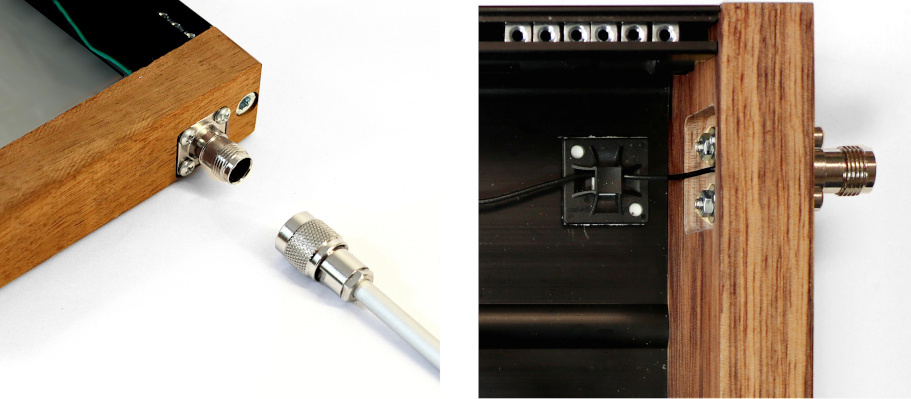
In an insulating wooden case or with wooden side panels, the antenna connectors can also be directly mounted. With the right woodworking tools, the connector can be slightly recessed, and a cutout can help attach the connectors with screws.

 
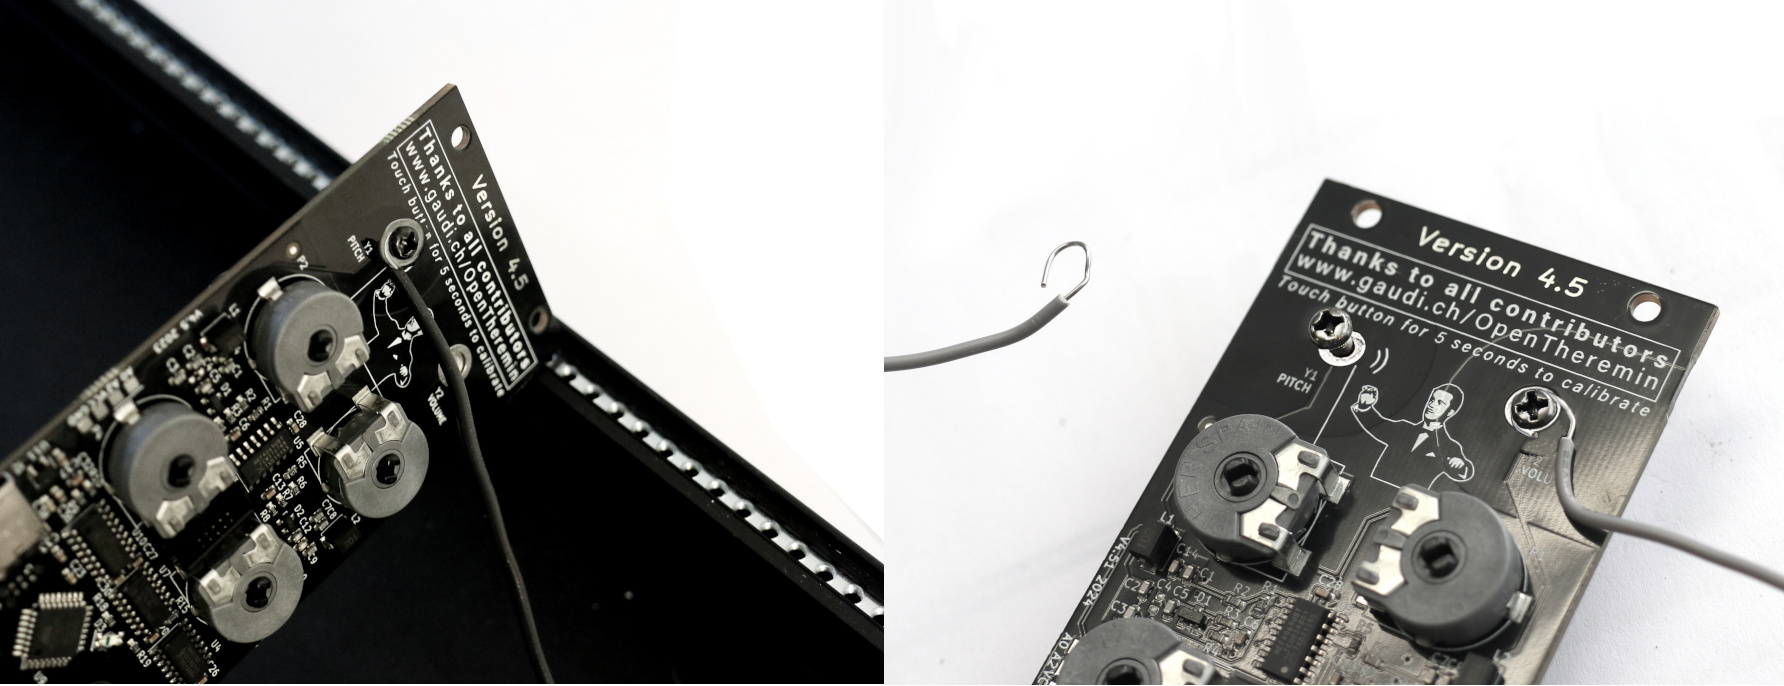
Connect the antenna terminals to the screw terminals of the theremin board using the stiff antenna wire. Cut the wire to length and attach it with plastic wire mounts to prevent the antenna wire from touching the metallic case and to keep it away from any other electrically conductive parts in the system.

Mount the antennas using the 90 degree TNC connector.

Getting started with the Eurorack OpenTheremin with MIDI

Grounding the Theremin

The theremin measures smallest variations between the antennas and your hand and translates this into sound. The electric loop with the instrument is closed from your hand, through the floor into the ground and from ground back into the instrument. This is why proper grounding of the instrument is important. Make sure that your Eurorack system is properly grounded through the power adapter or add an extra grounding wire.

Auto-calibration of the theremin

For the theremin to adapt to it’s environment it needs calibration before playing. The OpenTheremin V4 has an electronic auto calibration built in, it makes calibration very easy. To do so
follow these steps:
a. Power the theremin. Let it warm up for a few minutes.
b. Now turn the two knobs VOLUME and PITCH to the middle position and the knobs REGISTER
and TIMBRE all to the left.
c. Touch the FUNCTION button on the theremin for about 3 second. The LED-light will turn pink and
the theremin will start the automatic calibration of the antennas. To not disturb the calibration step
away form the theremin and wait until the blue LED-light goes back on. The calibration should take
about 60 seconds.

The calibration values are stored in the theremin. So you only have to do this procedure once. If
however you move your theremin or feel that it is not playing well, you can always repeat the
procedure to re-calibrate.

Functionality of the knobs:

The Eurorack OpenTheremin comes with MIDI functionality pre-installed.

The PITCH knob allows you to fine adjust the playing range of the pitch antenna (zero beat).

The VOLUME changes the sensitivity of the volume antenna.
For a good introduction on how to tune the theremin see this introduction by Carolina Eyck:
https://youtu.be/blOmm6e-Qu4

You can mute your theremin by pressing the FUNCTION button.

The REGISTER knob is to select a parameter and the TIMBRE knob to select a value. To change the settings, select a Parameter from the list below and move "Parameter's Value" to change corresponding setting. While you rotate the pots, the LED toggles (OFF/PINK) every steps to give you some angular feedback before going back to PLAY/MUTE Status.

Register: 4 positions as in original Open Theremin V3
Timbre: 8 positions as in original Open Theremin V3
Channel: 16 positions (channel 1 to 16)
Rod antenna mode: 4 positions (Legato off/Pitch Bend off, Legato off/Pitch Bend on, Legato on/Pitch Bend off, Legato on/Pitch Bend on)
Pitch bend range: 5 positions (1, 2, 4, 5, 7, 12, 24, 48 Semitones). For classical glissando and in order to have same note on audio and MIDI, use exactly same pitch bend range on your synth. Maximum setting possible is recomended.
Volume trigger / Velocity sensitivity (how fast moves the volume loop's hand): 128 positions (0 to 127)
Rod antenna MIDI CC: 8 positions (None, 8-Balance, 10-Pan, 16-MSB/48-LSB-GeneralPurpose-1, 17-MSB/49-LSB-GeneralPurpose-2, 18-GeneralPurpose-3, 19-GeneralPurpose-4, 74-cutoff)
Loop antenna MIDI CC: 8 positions (1-Modulation, 7-Volume, 11-Expression, 71-Resonnance, 74-Cutoff, 91-Reverb, 93-Chorus, 95-Phaser)

Default configuration is: Register = Lowest Register, Timbre = 1st Waveform, Channel = MIDI Channel 1, Rod antenna mode = Legato on/Pitch Bend on, Pitch bend range = 2 Semitones, Volume trigger = 0, Rod antenna MIDI CC = None, Loop antenna MIDI CC = 7-Volume.

See also the MIDI page for more information.


Modular OpenTheremin

The OpenTheremin is a stand alone Theremin with built in oscillators. Through the control voltage outputs (CV) an existing modular system can be connected and controlled easily. However the design of the OpenTheremin version 4 allows the electronic circuit of the OpenTheremin to be built into a modular Theremin system itself. This page describes a possible arrangement of such a built.

OpenTheremin Modular

The dimensions of the OpenTheremin cirucit fit with the Eurorack format. However with the antenna and signal connectors there is some tinkering needed. The circuit does not feature a standard Eurorack connector yet and so we will have to be creative there.

Here is how it can be done.

1. The modular case


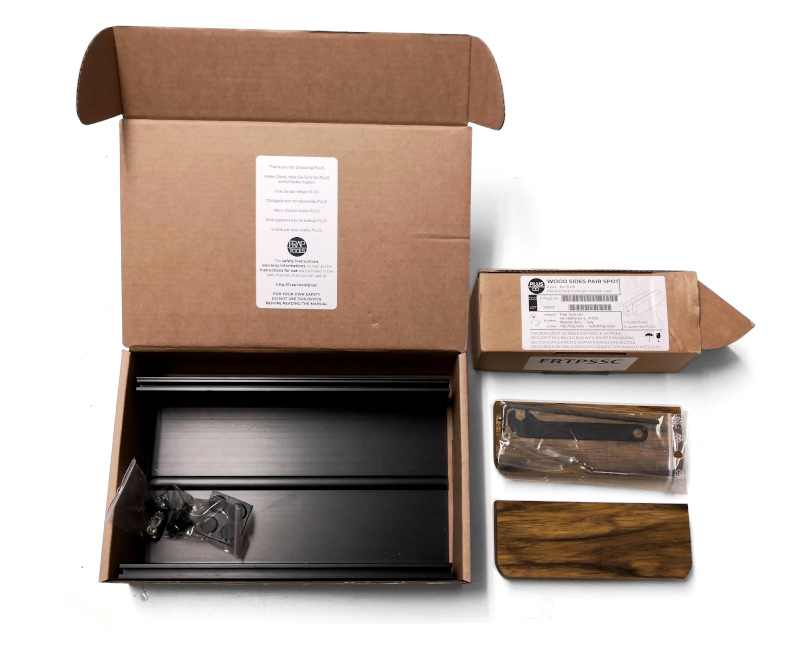
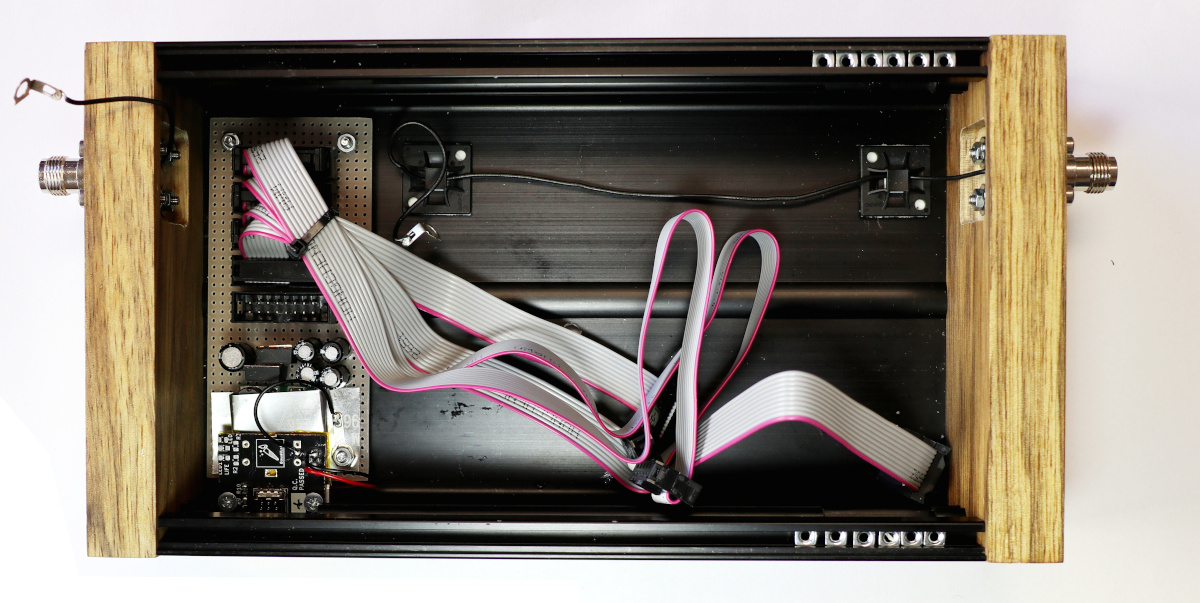
For this build I decided to go with the FRAPS TOOLS PLUS modular case. The case 42HP case is made from extruded aluminium with two wooden sides. The case would not need to be metal and in fact a wooden case may make the isolation of the antenna wire even easier.

2. The power supply


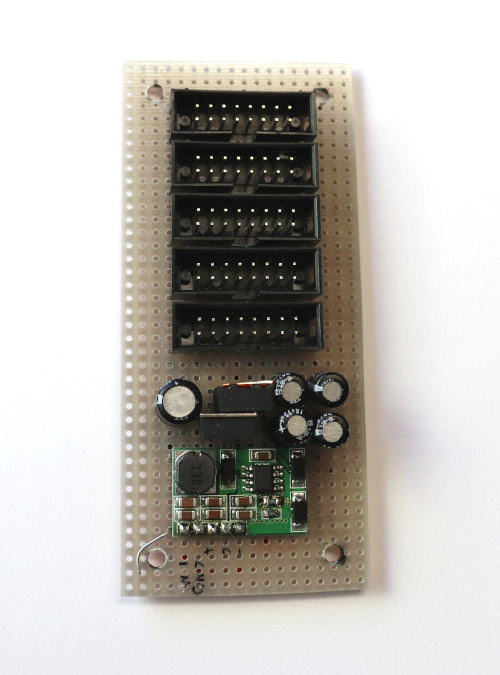
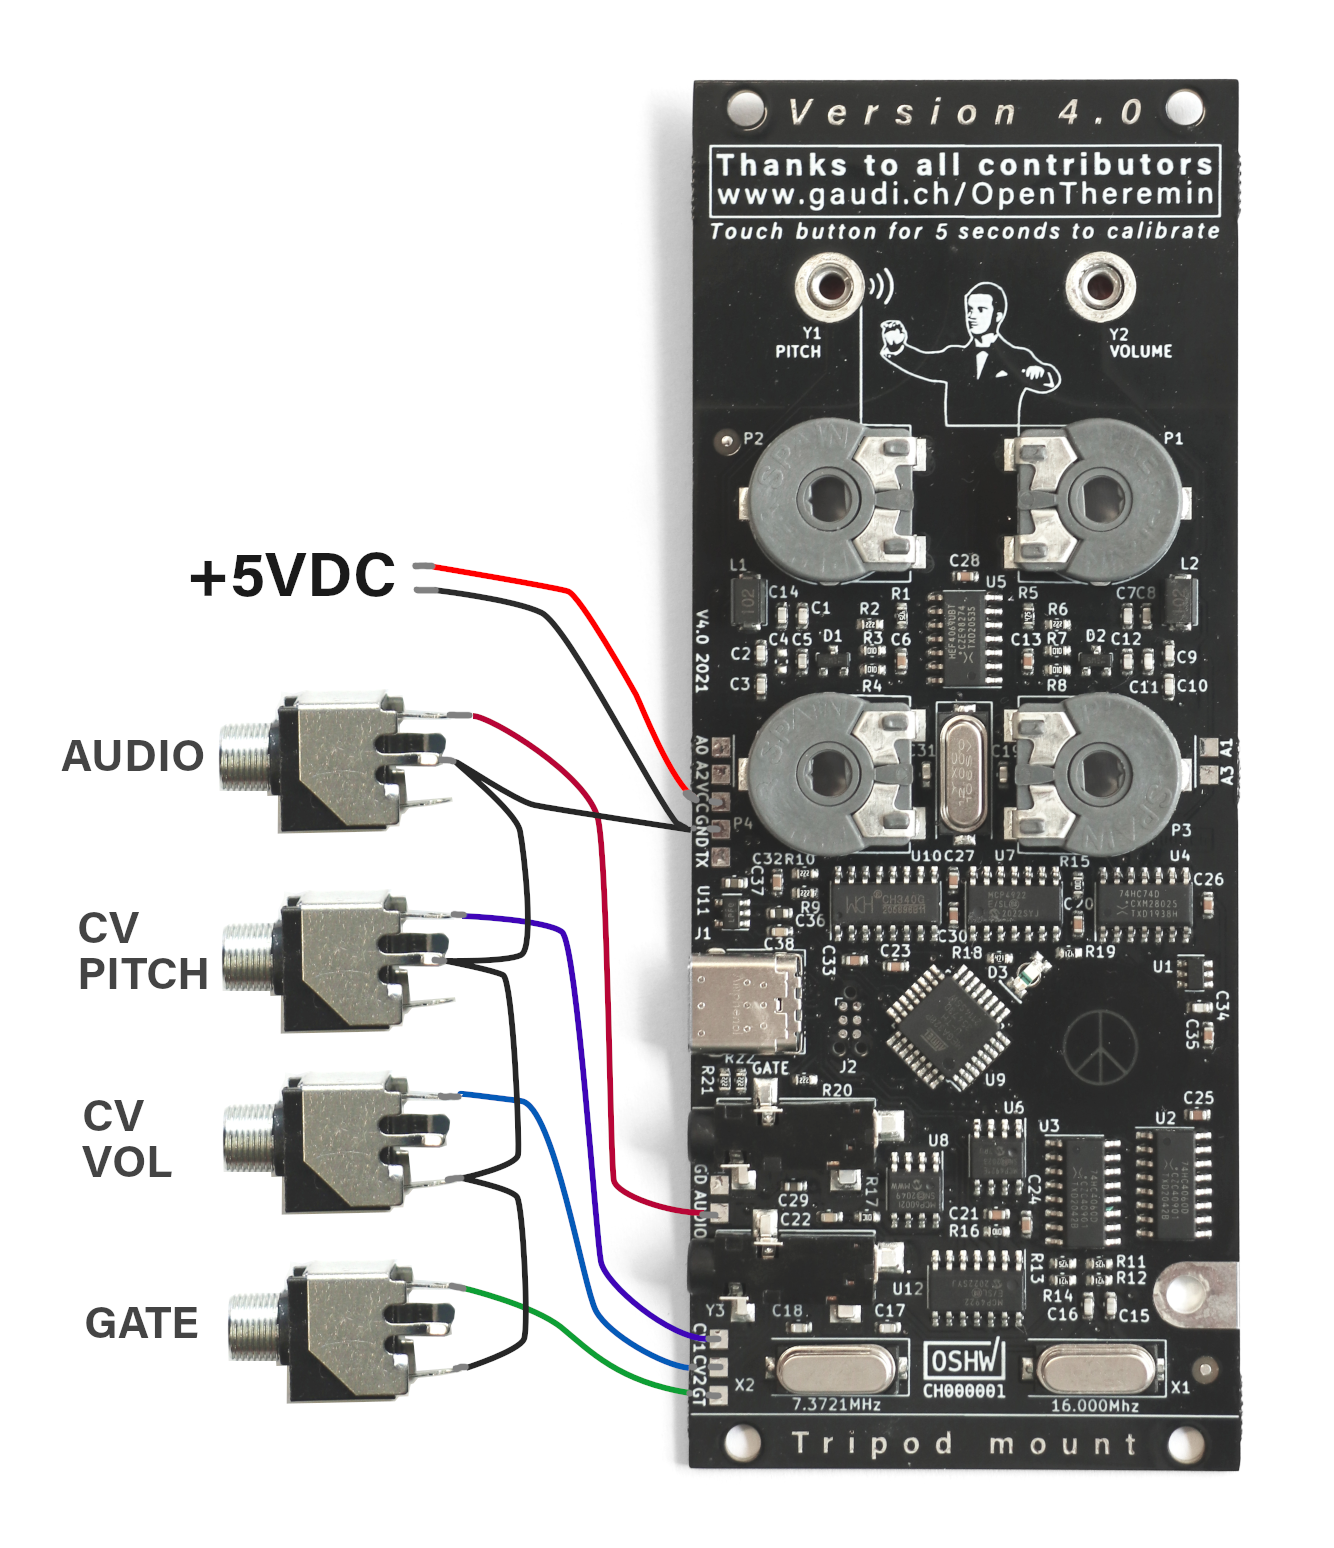
The OpenTheremin circuit needs to be powered with a stable 5V DC (max 100mA). So any rack power supply that also offers 5V should be fine. I decided to build one that can be powered through a simple USB-C connection. For this I used a cheap symetric +/-15V step-up converter module followed by two linear regulators.

As a commercial alternative I want to recommend the psu II – 1hp power supply solution by our friends at seismic industries. This super slim USB-C power module provides +/- 12V and 5V you need for the Theremin.

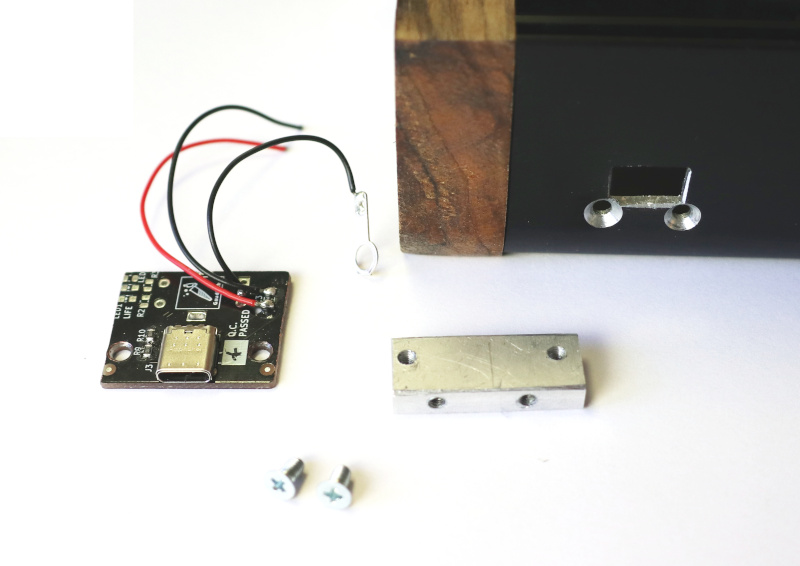
My DIY power module was then wired up to a USB-C break-out board that screws to the case.


 3. Antenna connectors

Theremin Antenna connectors BNC

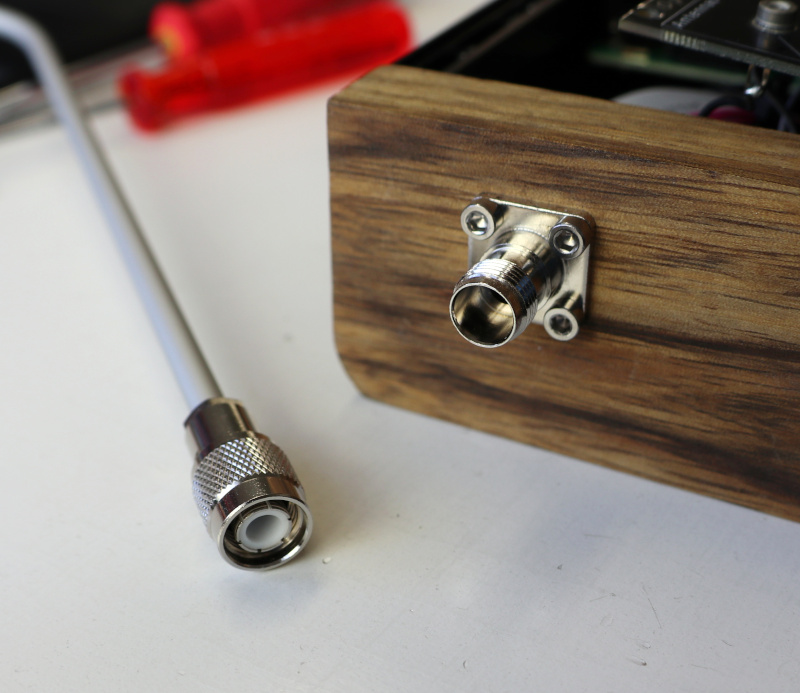
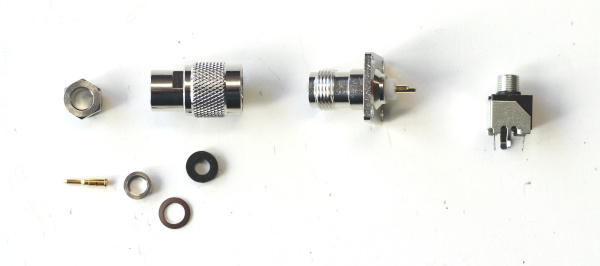
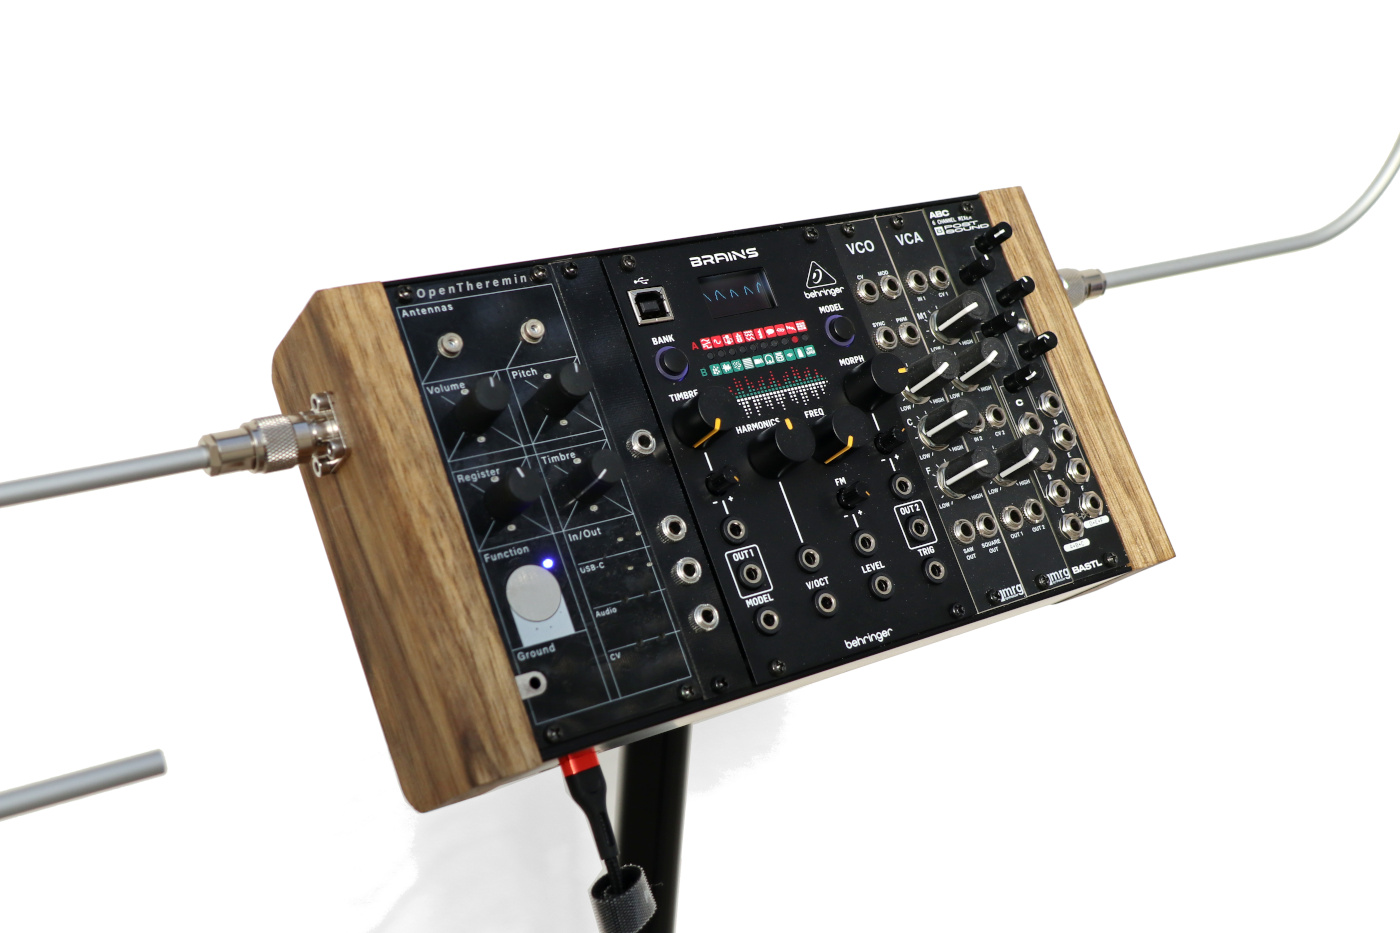
For the modular theremin I choose a common TNC connector to mount the antennas to the wooden sides. The aluminium tube connects to the outside of the connector as it does not actually need the co-axial connection. It just makes for a solid and easily removable connection.

The nut on the TNC connector had to be drilled slightly bigger to fit the 6mm aluminium tube. The tube was then just glued in with epoxy and the electrical connection made with a bit of conductive silver glue.

A stiff wire connects the antenna terminals with the screw terminals on the theremin board. The wire is fixed with plastic wire mounts to prevent the antenna-wire from touching the metallic case.

3. Signal Beak-Out Board.

Next the output jacks need to be wired up. All the signals can be found on soldering pads at the edge of the board.I made a small front pate with holes for the jacks and labelled them accordingly. The gate pad is quite close to the edge and I had to be careful for it not to touch with the rack frame.

I then screwed everything in and I think it is looking great. The audio signal can be used in combination with the control voltages and the gate.

4. Choosing Modules to combine with the Theremin

Finally the most creative part is choosing Eurorack modules to combine with the OpenTheremin.

OpenTheremin Modular

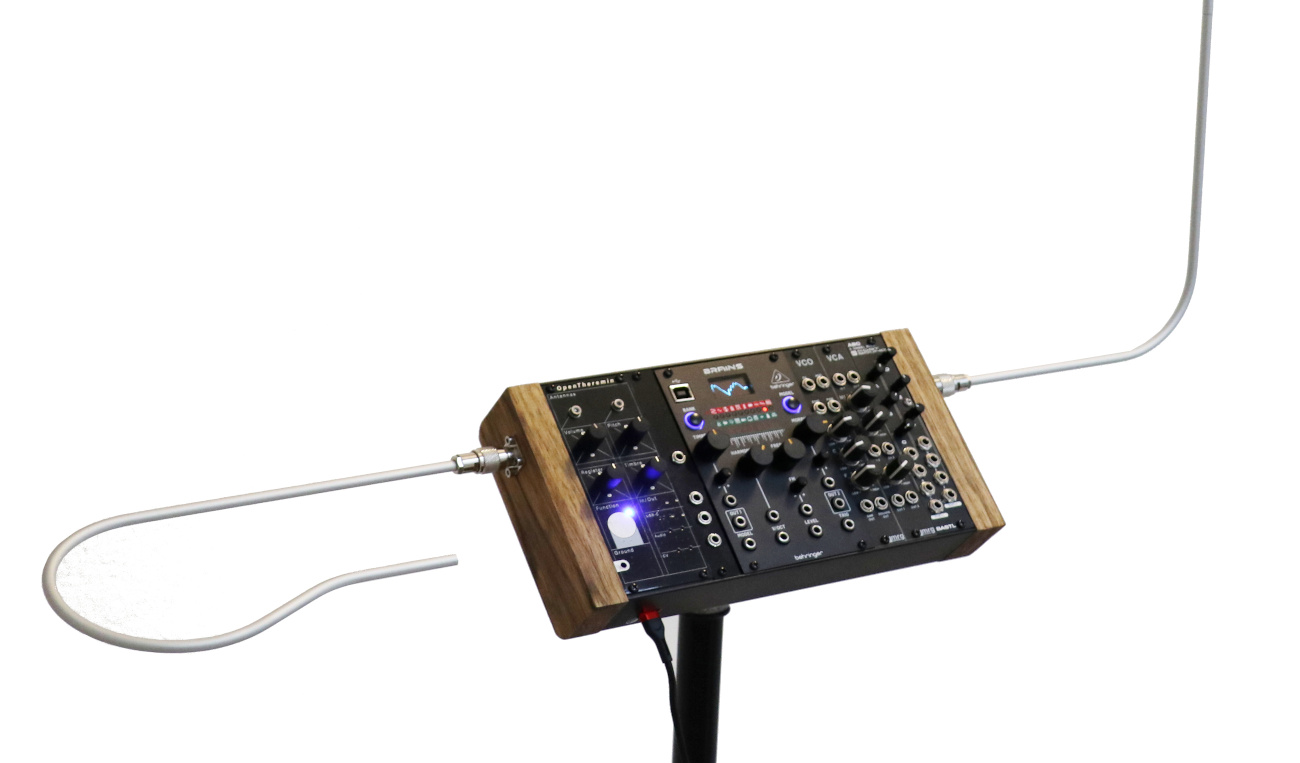
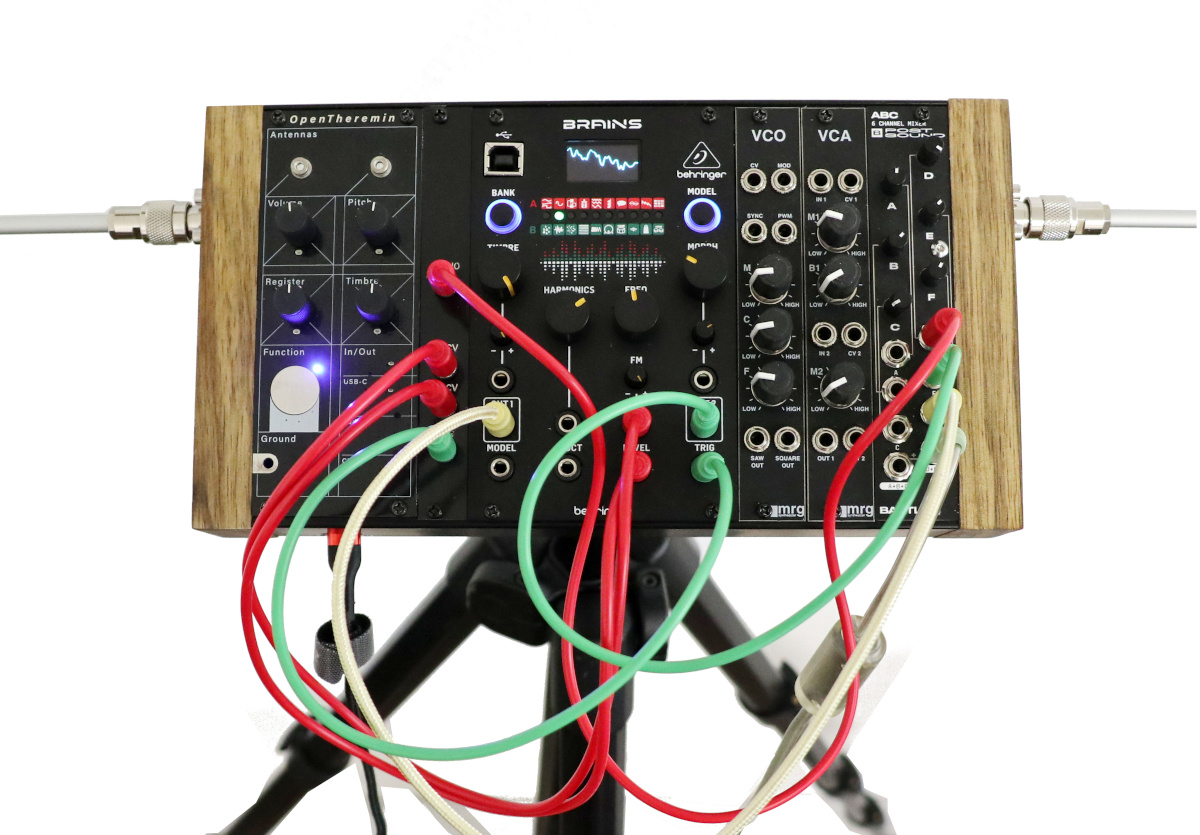
To emulate the sound and functionality using the control voltages a VCO (Voltage Controlled Oscillator) and a VCA (Voltage Controlled Amplifier) are needed. I build and experimented with the modules from MRG Synthesizers based in the UK.

For a wider variety of sounds and the possibilities to experiment with gate and envelopes I also put it the new Behringer Brains module. This module offers I wide variety of sound generators and has several CV inputs to control pitch, volume and parameters of the sound. The trigger input can be connected to the OpenTheremin gate to play percussion sounds. The Behringer Brains is a derivate from the famous Mutable Instruments Plaits and is based on its open source code. Unfortunately Behringer decided to not make their code available openly.

A small mixer in the setup proofed to be very handy when combining the different audio sources and to adjust the final volume. The perfect fit for me was the simple ABC Six Channel Mixer from Bastl Instruments. I had the chance to meet Václav and Ondřej form Bastl Instruments several times and they are just great.

So this is it. Time to patch all up and have fun.
OpenTheremin V4 boards are available at gaudishop.ch

 Modular OpenTheremin V4.


OpenTheremin V4 - MIDI

MIDI implementation for OpenTheremin V4 is here! While the Open.Theremin has it's own sound generator and can be played as stand alone instrument the MIDI software allows you to connect your theremin to any MIDI device or various MIDI synthesizers installed on you computer. This largely extend the functionality and is just great fun to play.
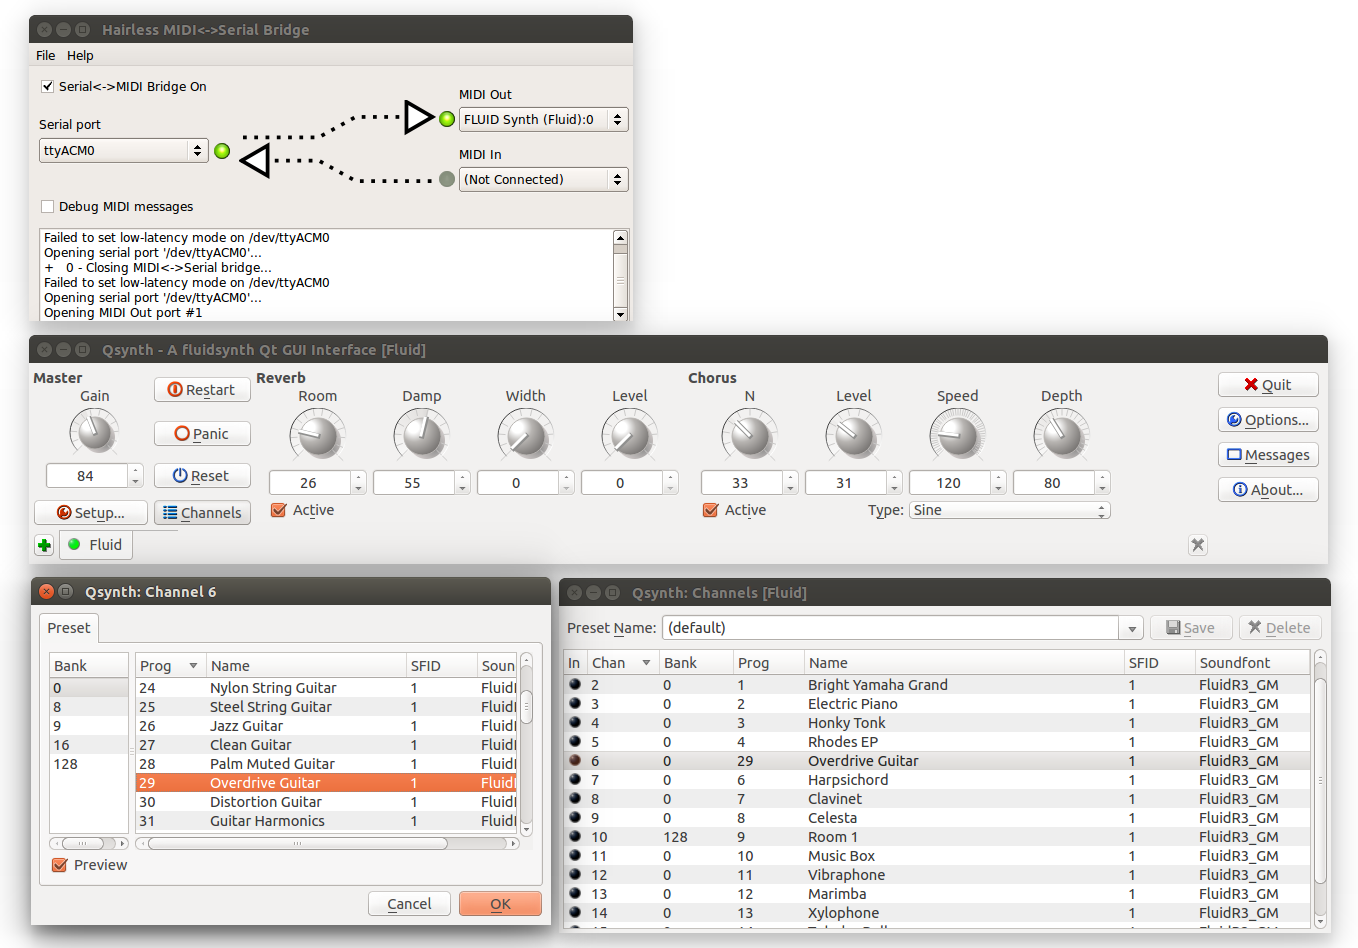
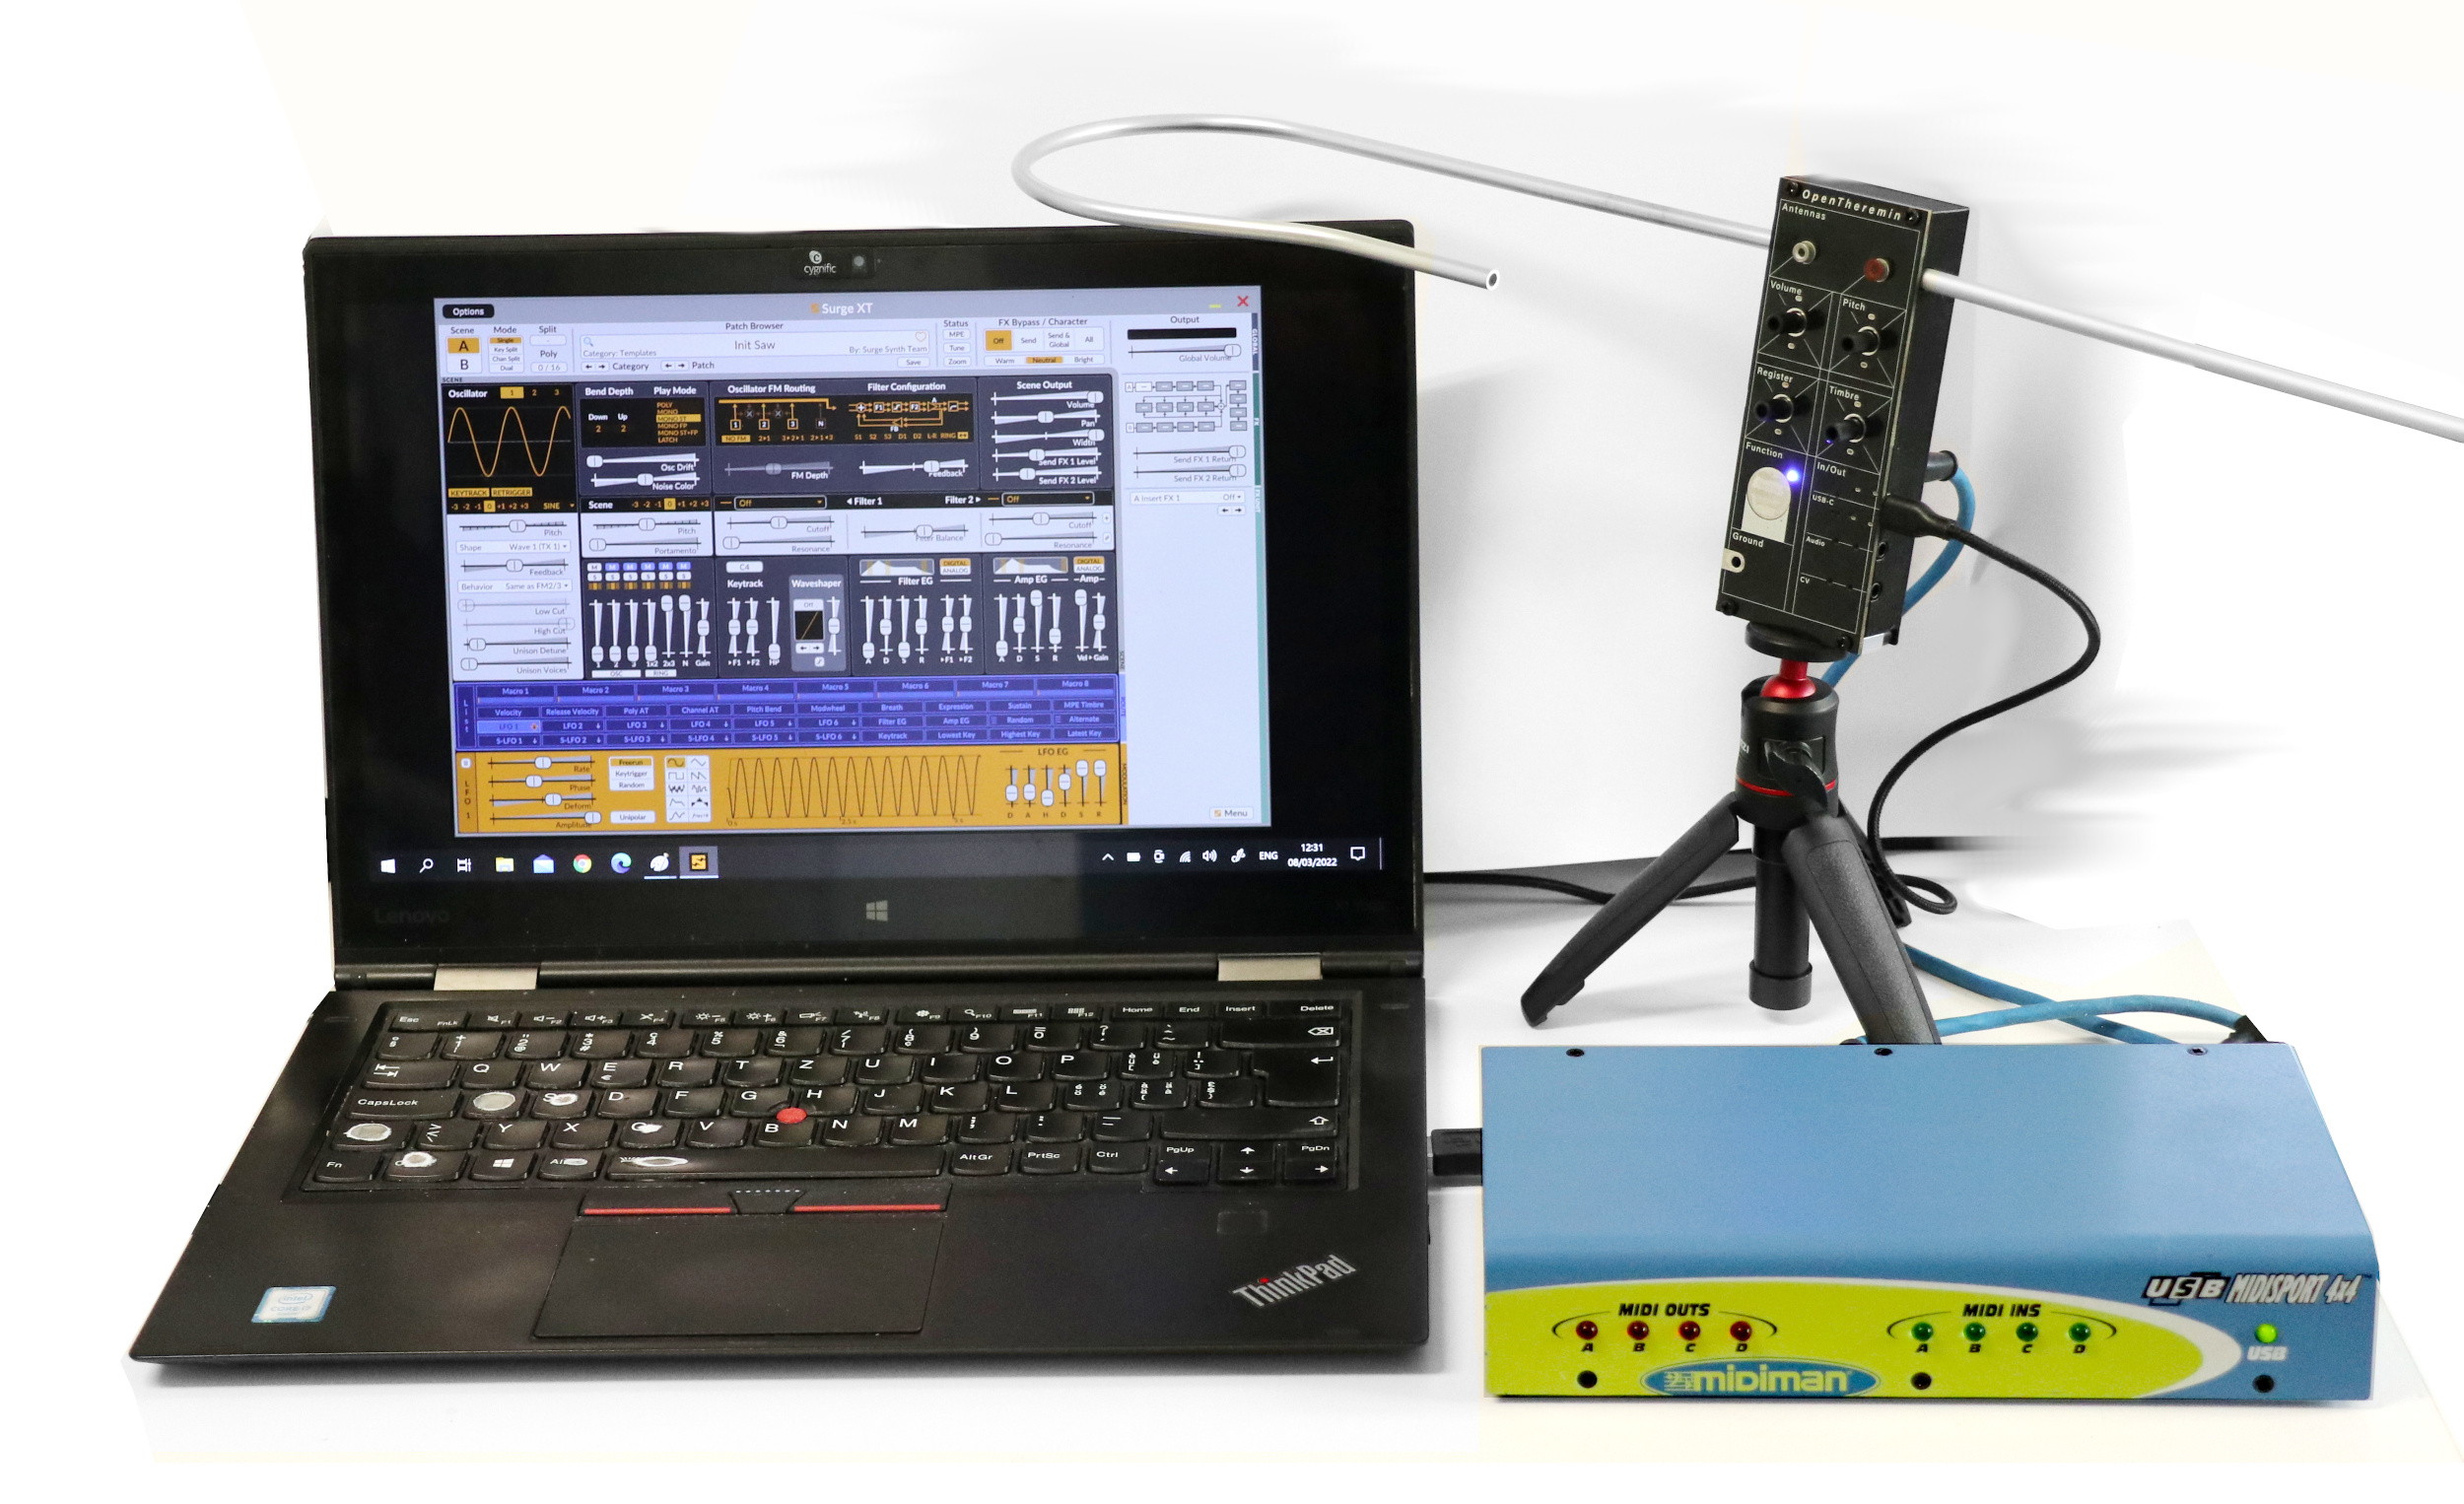
The following MIDI implementation and instructions were developed by Vincent Dhamelincourt and published in a friendly forked GitHub repository. Vincent is an experienced electronics and firmware engineer from Lunel, France and long term member of the OpenTheremin community. *** A great thank you! ***

Why MIDI on a theremin?

To know more what you can do with a MIDI on a theremin see the following document. All the tips here can be applied to Open Theremin.
MIDI-and-Theremin1.0.pdf

Connecting your OpenTheremin V4 to MIDI

There are two possible ways to connect your OpenTheremin via MIDI. You can go through the USB cable to your computer and use a serial to midi router or you can solder a true MIDI connector the OpenTheremin board. 

MIDI synthesizer on the computer

To control a MIDI synthesizer on your computer the OpenTheremin with MIDI software is sending MIDI at 115200 baud through USB serial.

Use a serial to MIDI router on your computer such as "hairless-midiserial" (https://projectgus.github.io/hairless-midiserial/) or SM Serial MIDI Converter (https://www.spikenzielabs.com/learn/serial_midi.html) .The router software will then create a MIDI port on your computer that can be used by your software MIDI synthesizer.


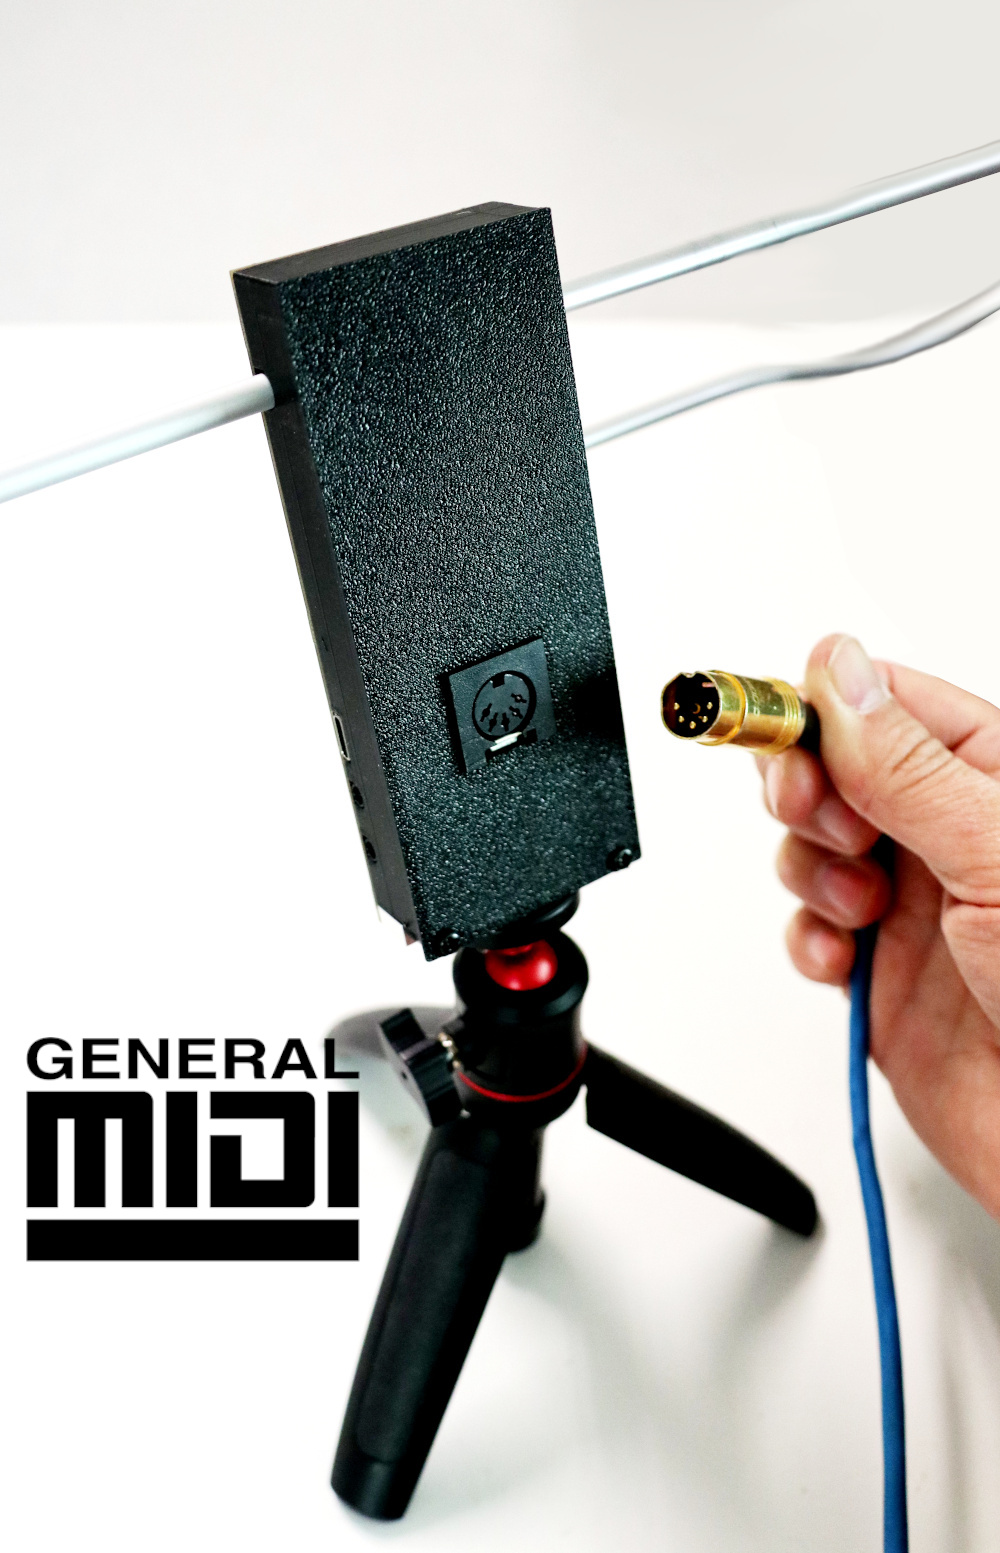
True DIN MIDI interface

You can also use the OpenTheremin MIDI implemented to communicate with a real MIDI device.

With a MIDI port the OpenTheremin can be connected directly to any MIDI compatible synthesizer or to a computer through a USB MIDI interface.

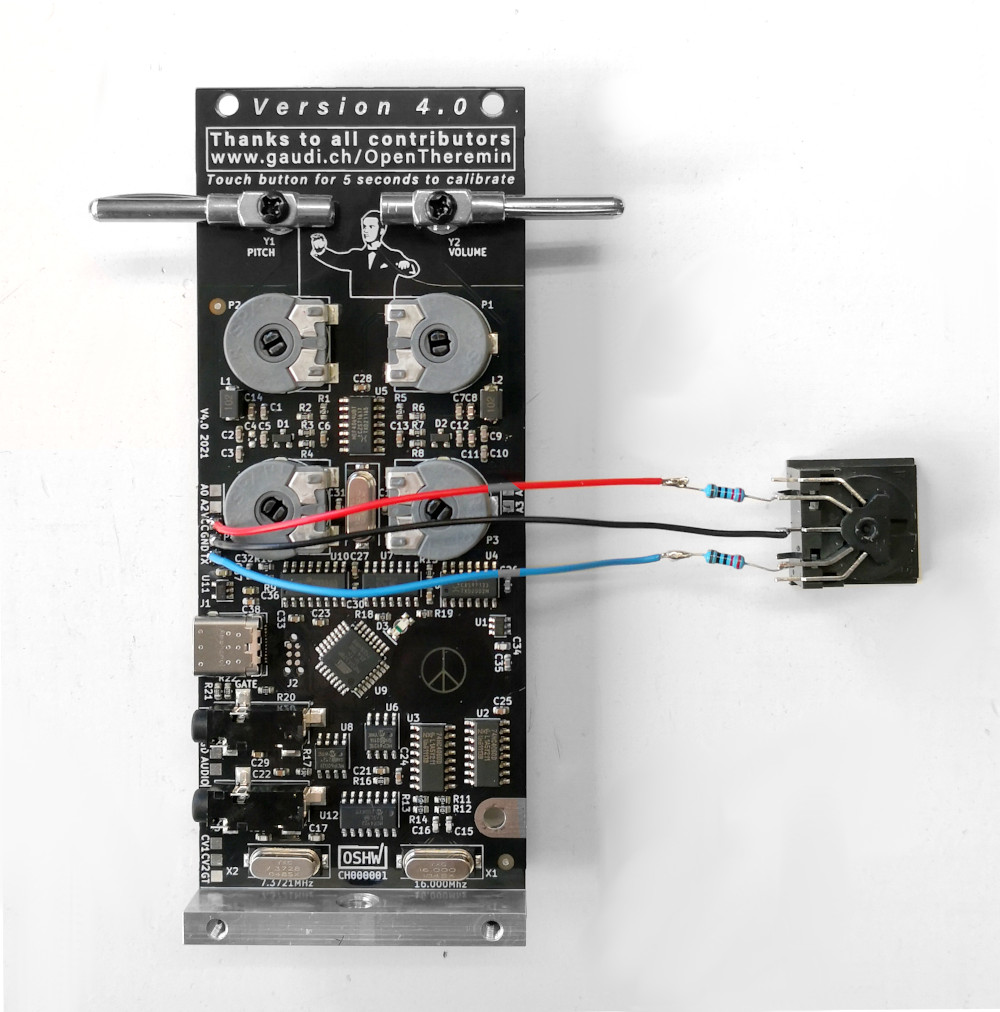
To do so add a female 180° five-pin DIN connector to the pads indicated with VCC, TX and GND. Use 220 Ohm resistors on the pins VCC and TX as shown here:

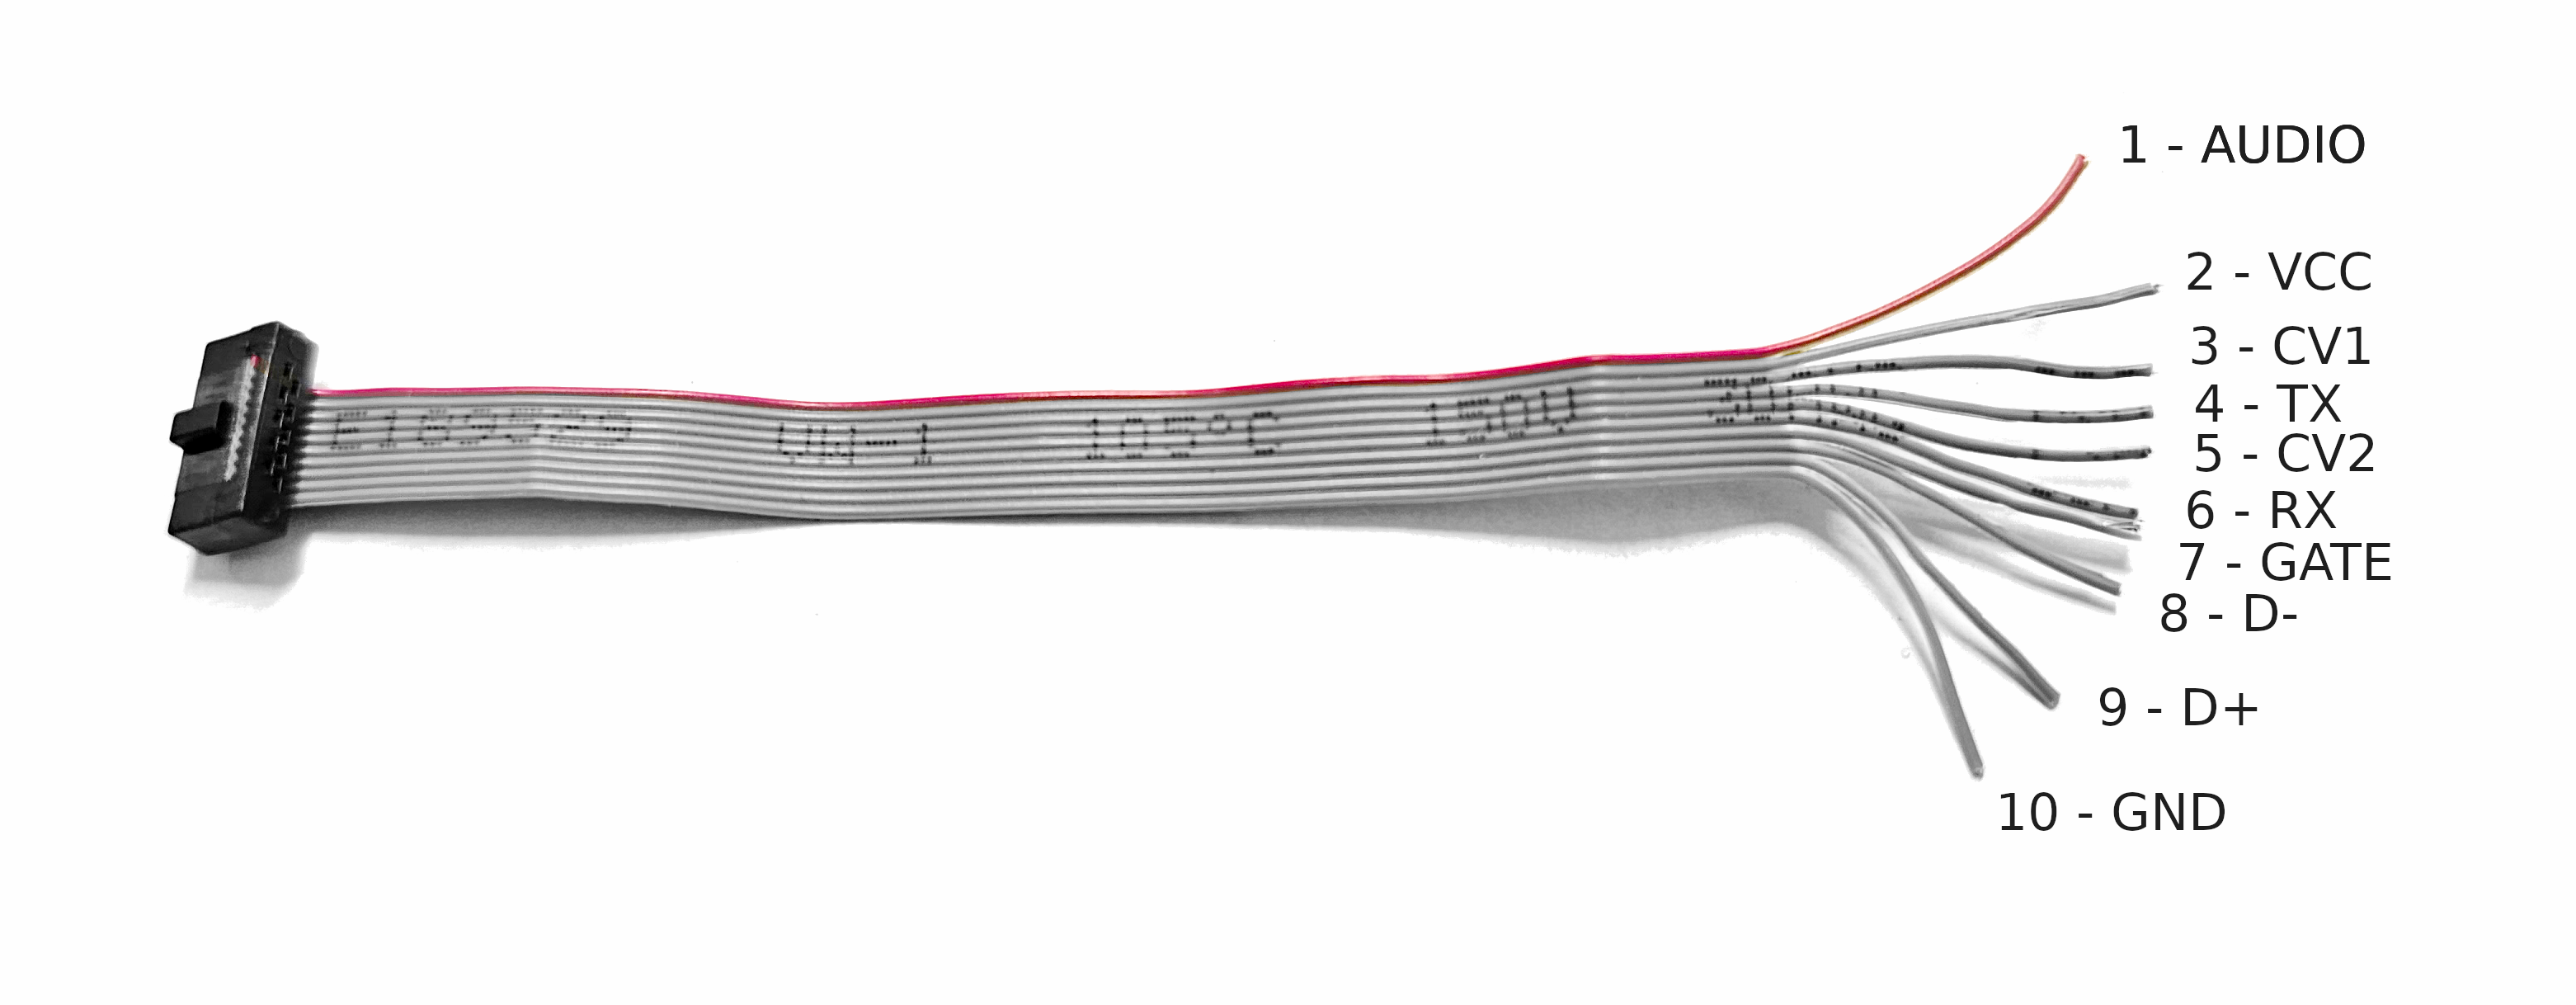
For the OpenTheremin Version 4.5 with break-out connector use a Flat Ribbon IDC wire cable with 10pins and 1.27mm spacing (link).

The pinout of the cable is as follows. The red wire is wire no 1.

Connect the DIN connector to the wires  2 (VCC), 6 (RX) and 10 (GND) as follows:


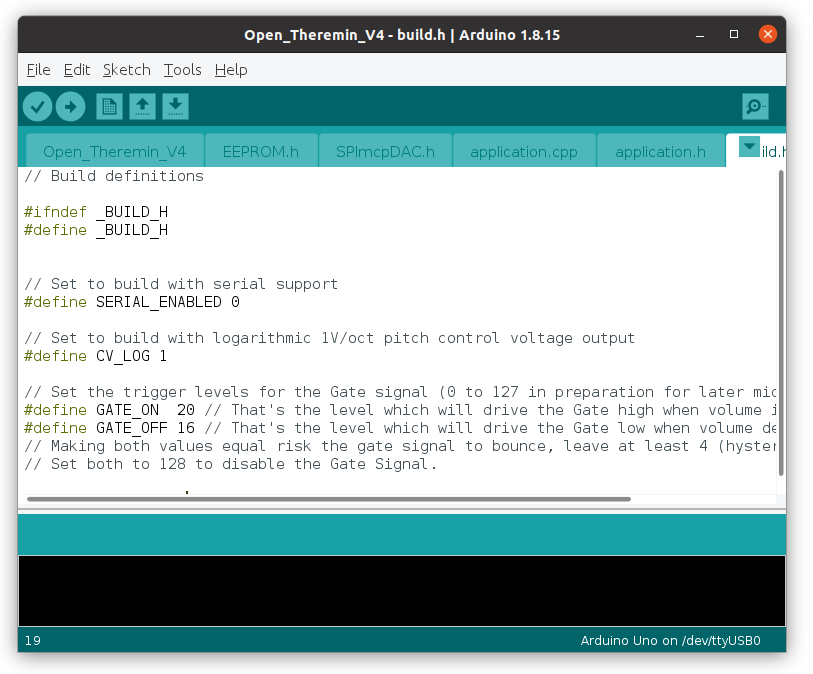
Set the baud rate to 31250 by changing Serial.begin(115200); to Serial.begin(31250); in the code (see instructions below).

With the OpenTheremin being very compact, instead of DIN 5 connector, you might want to use a TRS 2.5 mm (recommanded) or 3.5 mm Jack connector as recently adopted by the MIDI standard: https://www.midi.org/midi-articles/trs-specification-adopted-and-released


Installation:

Download and install the MIDI code for OpenTheremin V4 from the following git repository and carefully read the instruction below. I recommend to first setup and test the theremin as described in the instruction that came with the theremin (using built in sound generator) and then move to MIDI.

To install:

  1. Download the Theremin MIDI code from https://github.com/MrDham/OpenTheremin_V4_with_MIDI

  2. Open the File "Open_Theremin_V4.ino" in Software/Open_Theremin_V4/

  3. In "Application.cpp", take care of selecting MIDI mode that corresponds to your situation (put "//" in front off inadequate line - MIDI through serial is selected by default here):
    Serial.begin(115200); // Baudrate for midi to serial. Use a serial to midi router.

    //Serial.begin(31250); // Baudrate for real midi. Used with a DIN connector.

  4. Upload to your OpenTheremin as per upload instructions here.


Implementation:

The MIDI open theremin generates NOTE ON/OFF messages and Continuous Controler changes (MIDI CC) depending on settings and hands positions next to antennas.

NOTE ON/OFF:

In MIDI standard NOTE ON/OFF messages have a NOTE NUMBER and a VELOCITY.

Let's consider a Fade-in / Pitch Variation / Fade-out sequence (I use right handed convention):

  1. Fade-In
    When left hand moves away from VOLUME ANTENNA (LOOP) and volume crosses a settable threshold (Volume trigger), a NOTE ON is generated. VELOCITY depends on how fast left hand is moving. Right hand's position next to PITCH ANTENNA (ROD) determines the starting NOTE NUMBER.

  2. Pitch variation
    When right hand moves next to PITCH ANTENNA (ROD), PITCH BEND messages are generated (if activated) to reach exact pitch as long as pitch bend range will do. Beyond, a new NOTE ON followed by a NOTE OFF for the previous note are generated if legato mode is activated. Pitch bend range can be configured (1, 2, 4, 5, 7, 12, 24, 48 Semitones) to align with synth's maximum capabilities.

  3. Fade-Out
    When left hand moves close to VOLUME ANTENNA (LOOP) and volume goes under Volume trigger threshold, a NOTE OFF is generated to mute the playing note.

MIDI Continuous Controllers (MIDI CCs):

It is possible to assign independent MIDI CCs to the PITCH ANTENNA (ROD) and to the VOLUME ANTENNA (LOOP).

Configuration:

There is two calibration mode. Best use a speaker connected to the theremin to verify calibration and timbre variation.

Normal calibration of antennas: press button for 5 seconds -> Runs normal calibration of antennas (LED blinks until finished). Audio processing from antennas to output jack, including volume and pitch pots, LEDs and button functions, is exactly the same as in open theremin V4. You can play the Audio and the MIDI side by side.

MIDI configuration:

REGISTER pot becomes "SELECT PARAMETER"
TIMBRE pot becomes "PARAMETER VALUE"

To change the settings, select a Parameter from the list below and move "Parameter's Value" to change corresponding setting.
While you rotate the pots, the LED toggles (OFF/PINK) every steps to give you some angular feedback before going back to PLAY/MUTE Status.

  1. Register: 4 positions as in original Open Theremin V3
  2. Timbre: 8 positions as in original Open Theremin V3
  3. Channel: 16 positions (channel 1 to 16)
  4. Rod antenna mode: 4 positions (Legato off/Pitch Bend off, Legato off/Pitch Bend on, Legato on/Pitch Bend off, Legato on/Pitch Bend on)
  5. Pitch bend range: 5 positions (1, 2, 4, 5, 7, 12, 24, 48 Semitones). For classical glissando and in order to have same note on audio and MIDI, use exactly same pitch bend range on your synth. Maximum setting possible is recomended.
  6. Volume trigger / Velocity sensitivity (how fast moves the volume loop's hand): 128 positions (0 to 127)
  7. Rod antenna MIDI CC: 8 positions (None, 8-Balance, 10-Pan, 16-MSB/48-LSB-GeneralPurpose-1, 17-MSB/49-LSB-GeneralPurpose-2, 18-GeneralPurpose-3, 19-GeneralPurpose-4, 74-cutoff)
  8. Loop antenna MIDI CC: 8 positions (1-Modulation, 7-Volume, 11-Expression, 71-Resonnance, 74-Cutoff, 91-Reverb, 93-Chorus, 95-Phaser)

Default configuration is: Register = Lowest Register, Timbre = 1st Waveform, Channel = MIDI Channel 1, Rod antenna mode = Legato on/Pitch Bend on, Pitch bend range = 2 Semitones, Volume trigger = 0, Rod antenna MIDI CC = None, Loop antenna MIDI CC = 7-Volume.

MUTE BUTTON:
Sends ALL NOTE OFF on selected channel and stay in mute until it is pushed again.

AUDIO:
Audio processing from antennas to output jack, including volume and pitch pots, LEDs and button functions, is exactly the same as in open theremin V4. You can play the Audio and control MIDI devices side by side.

CV GATE:
CV GATE processing from antennas to output jack is exactly the same as in open theremin V4. You can control your analog devices and MIDI devices side by side.

CALIBRATION:
This device runs normal calibration of antennas after pushing button for a few second as per initial project

Results:
As long as you are inside pitch bend range you can play with the same linearity as with device's sound (same pitch is audible on stable notes without vibrato).
On 24 semitones wide pitch bend range capable monophonic SW synth (tested with Gforce's Minimonsta), the effect is rather good: We play on 4 octaves just like a normal theremin. 
12 semitones capable synth are also good but sometime note transition can be heard. 

SEE VIDEO:


HINTS and NOTES:

What can I do to get a theremin like glissando?
Activate picth bend and set pitch bend range of the theremin with a high value (12 semitones or 24 semitones). Set pitch bend range of the synth with the same value.

If I do not trigger with the volume hand it also seems to trigger a new tone with the pitch antenna. Guess this is how MIDI works.
When legato mode is activated, if you trigger a note (with volume loop) and go in one direction (with pitch antenna) a new note will be triggered at the limit of pitch bend range.

Legato mode is used as a workaround for a limitation of MIDI (max 24 semitones pitch bend). Maybe some synth can perform pitch bend on more that 2 octaves but none of mine does...

Tweakable parameters (in application.cpp):
Changing this to your taste may require some test and trial.

"#define VELOCITY_SENS 9" -> How easy it is to reach highest velocity (127). Something betwen 5 and 12.

"#define PLAYER_ACCURACY 0.2" -> Pitch accuracy of player. Tolerance on note center for changing notes when playing legato. From 0 (very accurate players) to 0.5 (may generate note toggling).

Possible Human Machine Interface (HMI)
The picture at https://github.com/MrDham/OpenTheremin_V3_with_MIDI/blob/master/MIDI%20Open%20Theremin%20V3%20HMI.bmp gives an example of possible HMI: on "Value" pot, red lines have 4 positions, grey lines have 5 positions and yellow lines have 8 positions. On "Parameter" pot you see coloured lines indicating which colour to follow for the "Value" pot.

Percussive Sounds
The volume trigger can be configured so as we have some volume at note attack on percussive sounds. The volume trigger setting is also used to set sensitivity for velocity (how fast left hand is moving when note is triggered). Volume trigger = 127 (Maximum) won't generate any NOTE ON. It can be used to generate MIDI CC only.

Manipulation of MIDI CCs
Manipulation of "Rod antenna MIDI CC" and "Loop antenna MIDI CC" is not error proof. MIDI newbies should be advised to change their value in MUTE mode.

Added and removed compare to Open Theremin V4.
Serial communication implemented for program monitoring purpose was removed (Particularly during calibration). If you need to monitor calibration for antenna problem fixing, please use original master branch.

Serial port is used to send MIDI messages now.

Support request about MIDI can be directed directly to Vincent here.

LICENSE:

Original project written by Urs Gaudenz, GaudiLabs, 2022 GNU license. This Project inherits this 2022 GNU License. Check LICENSE file for more information All text above must be included in any redistribution

OpenTheremin Software Update

The software of the OpenTheremin V4 can be easily updated to new versions that may unlock new features. The OpenTheremin is compatible with the Arduino UNO standard and all software is open source. Follow the instructions below to load new software to your OpenTheremin.

Install Arduino IDE

To upload software to the OpenTheremin get the latest version of the popular Arduino IDE programming environment. Download and install here:
http://arduino.cc/en/Main/Software

Instruction on how to install the Arduino programming tool and how to use it can be found here:
http://arduino.cc/en/Guide/HomePage

Download OpenTheremin Software

Download the latest OpenTheremin V4 software from the public GitHub repository.
To download all the files you need, click on the green "Code" button and choose "Download ZIP" here:

https://github.com/GaudiLabs/OpenThereminV4

Unpack the ZIP archive to a folder on the computer.

Upload the Software to the Theremin

  1. Connect the OpenTheremin V4 to the computer using the USB cable.
  2. Open up the Arduino IDE
  3. Open the File "Open_Theremin_V4.ino" from the "File" menu
  4. Selecting the correct usb port on Tools -> Serial Port
  5. Select "Arduino UNO" from the menu Tools -> Board
  6. Upload the code by clicking on the upload button.


If uploaded correctly the blue light should light up on your Theremin.


Subcategories

  • Current Users
    Questions that users migrating to Joomla! 1.5 are likely to raise